<-- Back to Part 17: Kaypro - My Robie
--> Go to Part 19: Roadrunner ROM
MFM Emulators
Last revision of this chapter: November 8, 2024
- David Gesswein
- General
- Details - Analyzing, Reading & Emulating
- Assembling a new one
- Porta One - DREM
- External Links
- Information
- References
David Gesswein - pdp8online
I am currently (Nov 2024) using the MFM Hard Disk Reader/Emulator by David Gesswein on two Computers with two different operating systems. My Kaypro 4/84 is runing CP/M and my AT 80286 uses DOS 6.22. On the Kaypro I use a single drive emulation and on the AT286 I emulate two drives parallel.
One result (from 2022) in advance. My Kaypro 10/83 does not make a single noise as if it were out of order. The fan is disconnected, as floppy drive I use a Gotek with Flashfloppy and the MFM emulator by David Gesswein replaced my 42 MByte Seagate ST277. There is absolute silence, almost eerie, but everything works fine. Since Nov 2024 I am using my Kaypro 10/83 again in its original state with a Seagate ST225. The AT286 is not quite as quiet because the power supply unit has an integrated fan.
General


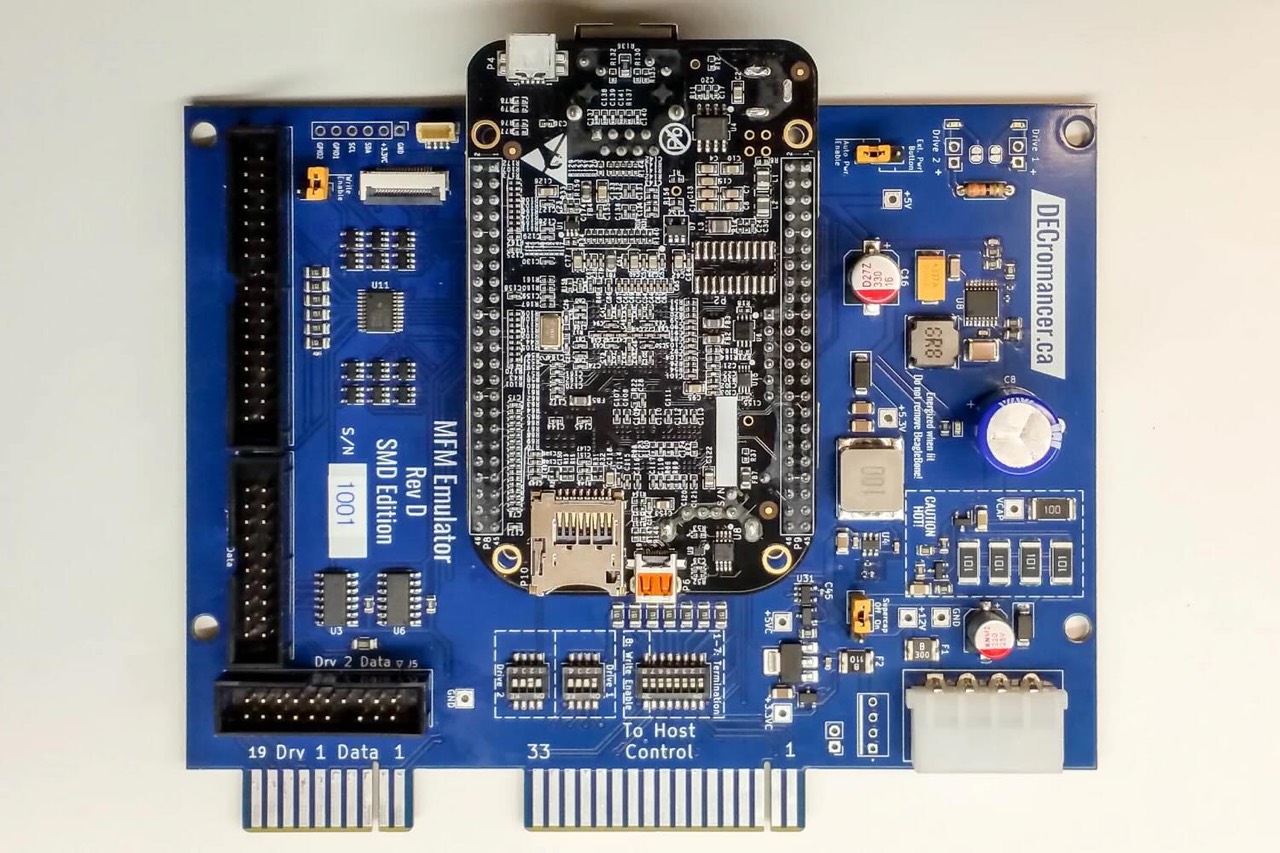
There are four revisions (Nov. 2024: A to D) of the MFM emulator, whereby DECromancer has its own SMD version based on revision D. I still use revision C. This has five bulky capacitors (C1 to C5, 2.7V, 10F) as an emergency power supply when the Kaypro is shut down.
For the MFM emulator I read my Seagate ST277 with 42 MByte with the same. How 42 MByte? Standard Kaypro 10 sizes are only 2 x 4,5 MByte! Yes, but with the TurboROM from Advent (v3.4) you can create much more drives and actually use them. I currently have 5 x 8192K of space available on my Kaypro 10/83. For CP/M these memory sizes are of course gigantic.
Before you start, please carefully read the following documentation (David updated his pages in mid-2024):
- MFM board assembly
- MFM board testing and reading
- MFM software installation and updates
- MFM reading & analyzing
- MFM emulating
Details
Basics
[David Gesswein] For the OS 11 image you now need to log in as debian, password temppwd. Use sudo for commands that need root or sudo su - to get a root shell. For OS 7.11 login is root with no password. If in doubt which version is running try root no password first. For v4.00 or later the executables are in debian's path for OS 11 or root's path for 7.11. You don't need to cd to the executable and you don't need ./ in front of the command. The setup* scripts and emulator executables don't need root on OS 11. The MFM code is in /opt/mfm.
The connection between my macOS and the emulator is easily established via the USB interface and the program SERIAL. You can also use SSH in the TERMINAL window: ssh beaglebone.fritz.box -l root. I have a Fritz!Box!
For the file exchange between the emulator and my computer I use an USB stick and/or a MicroSD card (both DOS FAT32). I use memory sizes of 8 and 4 GByte. You have to mount the devices manually or modify the script emu/start_mfm_emu.
Because the BeagleBone has no real time clock and no battery, I have to set the date manually or conncect the network cable at boot. Wait 10-20 seconds before you log in. NTP needs a few seconds to set up the date.
As a refresher, here are the necessary UNIX commands. The easiest way is to write a small shell script for mounting and backup. For example, you can change the .profile file in your root directory; there are various possibilities.
# after login you are in /root
# show the devices with
fdisk -l
# 'my' USB stick is /dev/sda1
# 'my' µSD card is /dev/mmcblk0p1

# make directory /usb for the USB stick
# /mnt already exists for µSD card
# use the complete file name incl. directory
mkdir usb
# mount USB & uSD
mount /dev/sda1 /root/usb
mount /dev/mmcblk0p1 /mnt

# if you insert the µSD card 'after' boot then
# mount /dev/mmcblk1p1 /mnt
A very important configuration file is /etc/mfm_emu.conf, see next. I have set the EmuFN1 file to /mnt/emufile_a; default is /root/emufile_a. Why? I have two MFM emulators but I only use one µSD card for both! The same applies to the USB stick for backing up all my files. I make 9 simple backup copies. My 42 MByte Seagate ST277 uses 102,6 MByte as image file. 1 plus 9 copies are 1 GByte. My µSD card has 4 GByte.
# This is an excerpt from: /etc/mfm_emu.conf
# ------------------------------------------
# Executable directories
EmuDir="/root/emu"
PowerFailDir="/root/powerfail"

# File name for first emulator file
EmuFN1="/mnt/emufile_a"
# File name for second emulator file. Leave blank if none
EmuFN2=""

# Type of backup. Blank for none, copy for simple copy,
# xdelta or rdiff to use those programs to reduce backup file size
Backup="copy"
# Number of backup files to keep
NumBackup="9"
Formatting an Existing Emulator Images
Yes, formatting an emulated hard disk works fine with my Seagate ST-225 und ST-251 images. The (real) ST-251 has the serial no 371119 and works fine, no bad sectors at all.
- ST-225: 605 cyl, 4 hds, 17 sec/trk, 21.4 MByte, 41,820 total sectors
- ST-251: 820 cyl, 6 hds, 17 sec/trk, 42.8 MByte, 83,521 total sectors
Using 1 or 2 Emulator Images
It is possible to use one or two hard disk emulations. The MFM emulator does not care. But now the question arises of the correct connection of the three ribbon cables in the case of two emulations. MFM hard disks are always connected with two ribbon cables. The data line with 20 pins and the control line with 34 pins (as with the floppy drive).
out FDC - 34p control - in MFM J2
out FDC - 20p data 1  - in MFM J1 (card edge)
out FDC - 20p data 2  - in MFM J6 (plugin)
This was the easiest part. Anyone who has ever connected two MFM hard disks to one MFM hard disk controller will of course know that a cable twister in the 34p cable is required. But we only have one MFM-EMU hardware, not two. Here the 34p control cable is connected without twist. Note: The floppy disk twist is not hard disk twist! My connections for DOS drives C: and D: are.
- J1 - drive 1 - drive select 1 - P7
- J6 - drive 2 - drive select 2 - P8
Other information is also circulating on the Internet. My information refers to: AT 80286, WD1006-MM1, MS DOS 6.22, drives C: and D:
If you use a Kaypro 10 or Kaypro 4/84 the emulator is jumpered as first (1st) drive (P7) and drive select 2 (DS2). Do not use the 2nd drive at P8.
Analyzing and Reading
Read here: MFM reading & analyzing.
Analyzing
cd mfm
./setup_mfm_read
./mfm_read -a
Reading
cd mfm
./setup_mfm_read
./mfm_read -a -e st277_kay10.ext -m st277_kay10.emu -t st277_kay10.tra
Emulating
Read here: MFM emulating. You have to make a reboot after analyzing & reading if you want to start emulating.
Manual Start
cd /emu
./setup_emu

# emulation a Kaypro hard disk
./mfm_emu --drive 1 --file st412_kay10.emu

# emulating two DOS ST 225 hard disk disks
./mfm_emu --drive 1,2 --file st225-c_286.emu,st225-d_286.emu
In the beginning, I worked almost exclusively with the autostart function from the next section. In the meantime (Nov 2024), however, I have stopped using this function and now work manually. The manual start is simply more flexible. In the meantime, I no longer use the ST277 (42 MB) with six partitions but only the very simple ST412 (10 MB) with two partitions or drives, i.e. A and B. This is for the simple reason that I can now use the FLPFMT.COM program from Kaypro 10 again. This requires drive C for formatting a floppy disk. And this is only possible if I have no more than two hard disk partitions. But I stayed with TurboROM from Advent.
Automatic Start
With Debian Linux you can use the top -b command to show all running processes. When everything is working fine you will find: powerfail, start_mfm_emu, mfm_emu. For automatic start you need the emulator file /root/emufile_a.
For the (default) automatic start you need the emulator file /root/emufile_a. Note, my emulator file is located on the µSD card, mounted on startup at /mnt.
# enable autostart with
systemctl enable mfm_emu.service

# and you will see in the terminal window
ln -s '/etc/systemd/system/mfm_emu.service' '/etc/systemd/system/sysinit.target.wants/mfm_emu.service'

# disable autostart with
systemctl disable mfm_emu.service

# and you will see in the terminal window
rm '/etc/systemd/system/sysinit.target.wants/mfm_emu.service'
Attention! If you copy the emufile_a while the emulator is running the last write may not have been written back to the file. To ensure the write is done stop the emulator, manual back up the file and start the emulator again. These steps are very important if you want to make a complete backup of your hard disk emulation in between. Nothing is worse than losing data; better safe than sorry. I always make these backups (n = 1 to x) on the USB stick.
systemctl stop mfm_emu.service
cp /mnt/emufile_a /root/usb/emufile_a.n
systemctl start mfm_emu.service
I have tested the autostart and the start/stop function. It works fine, but as described above, it takes a short time until the emulator is started. Therefore, first switch on the emulator, wait one minute and then switch on the Kaypro.
Currently (Oct 2024) I use the emulator with my Kaypro 4/84. I restored my Kaypro 10/83 to its original state but with a Seagate ST225 because the ST277, which had not been used for two years, was no longer readable.
There is a little mistake in the next picture. The last drive F has not 8 but 2 MB!

Assembling a new one
Granted, this project is not inexpensive ($180 assembled, Oct 2024), but I just had to give it a try. I ordered (in 2022) the emulator revision C (assembled) from DECromancer in Canada, but you can also take the trouble to order PCB and all components yourself. This is a bit cheaper but the project will still not be cheap. Before you start assembling your own emulator please read carefully the assembly notes. Depending on the power supply you use at U12, you will need to install different resistors and capacitors!
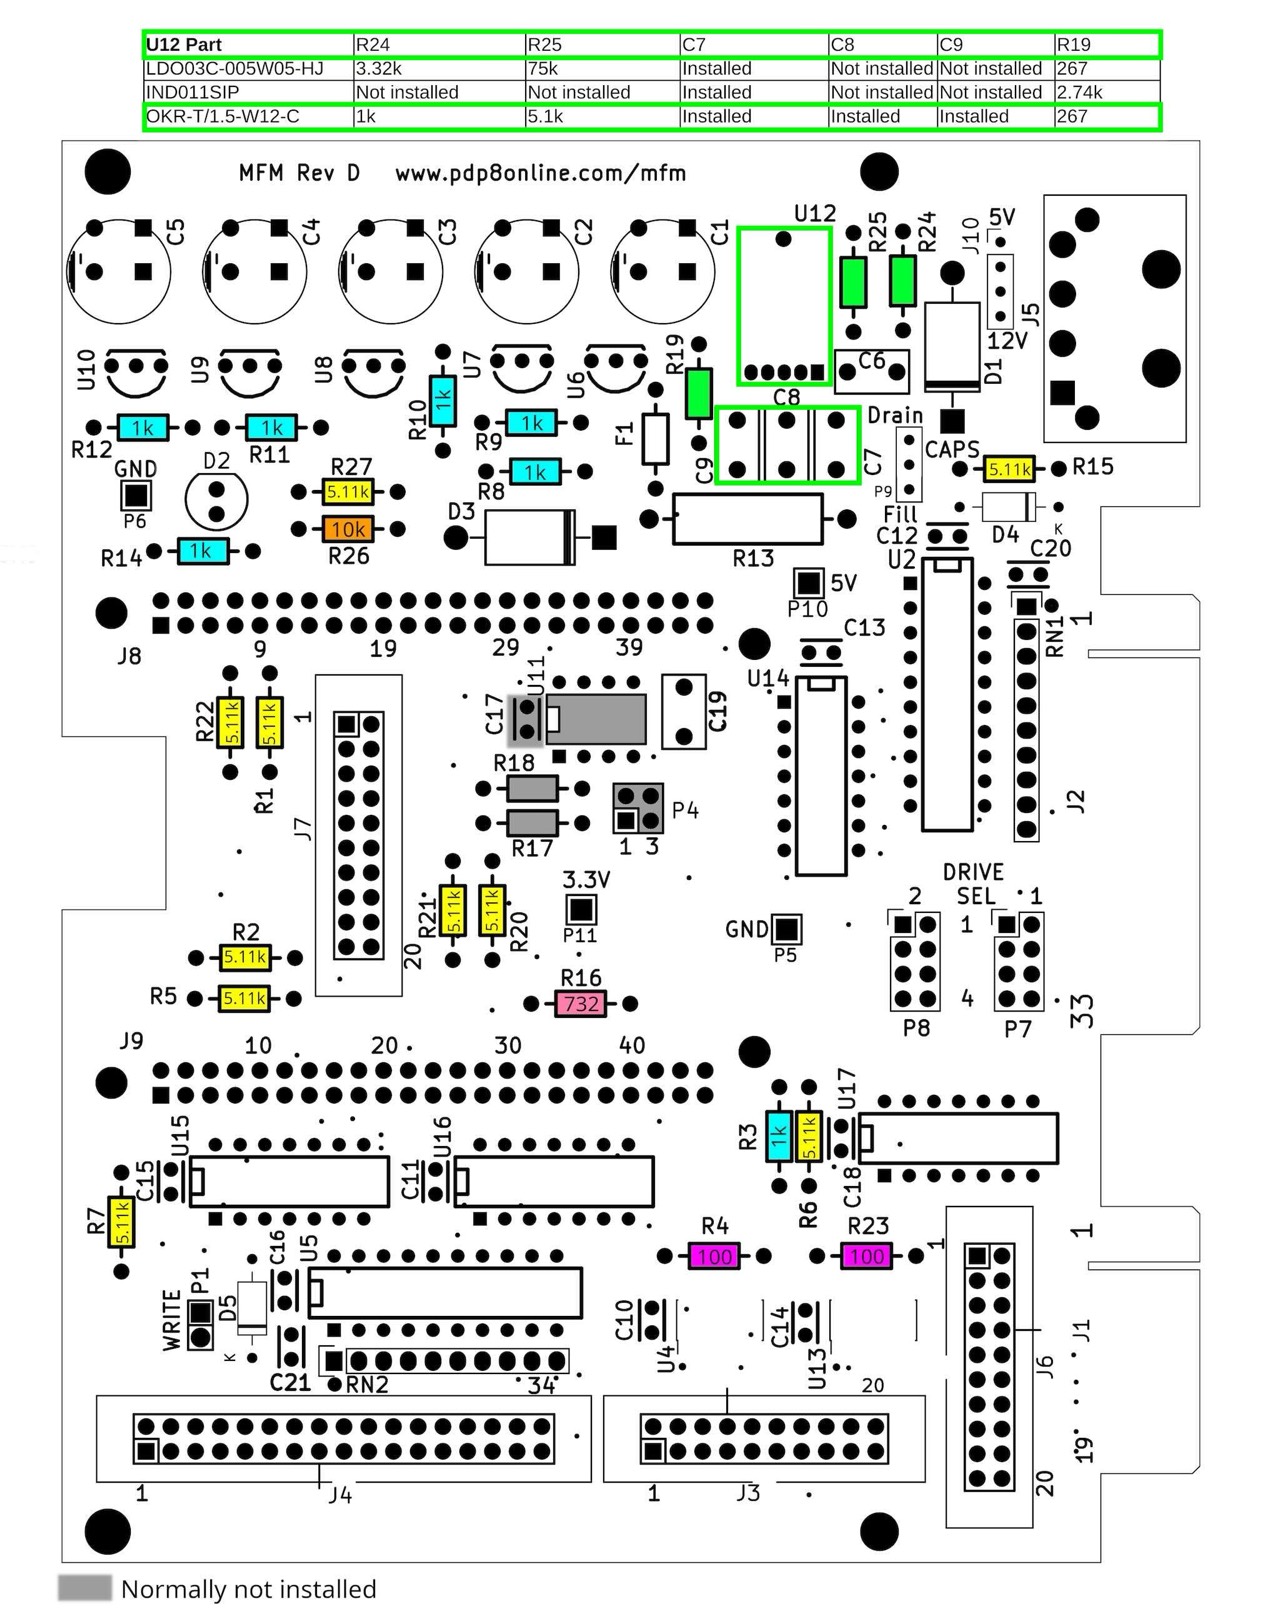
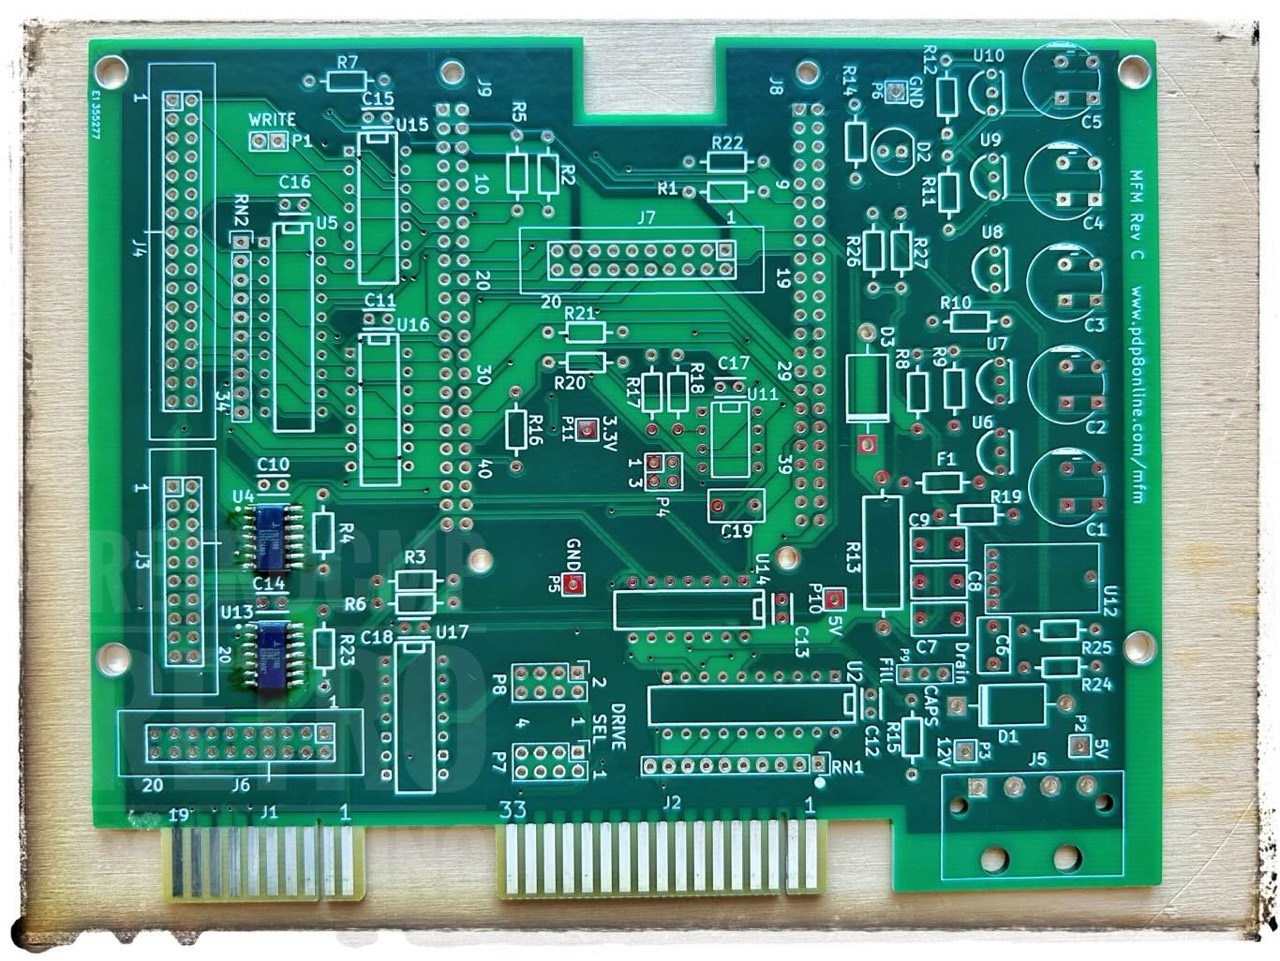
I still have a 2nd complete set (revision C) of the individual components since month and now (Oct 2024) I want to start assembling it. With the exception of the two smaller SMD ICs, the board should not be a major challenge. I will make a 1:1 replica. I will start with the small components such as resistors and capacitors and then continue from the inside out. I will then replace the BeagleBone and test whether the circuit board is faultless. Finally, I will reflash the new BeagleBone.
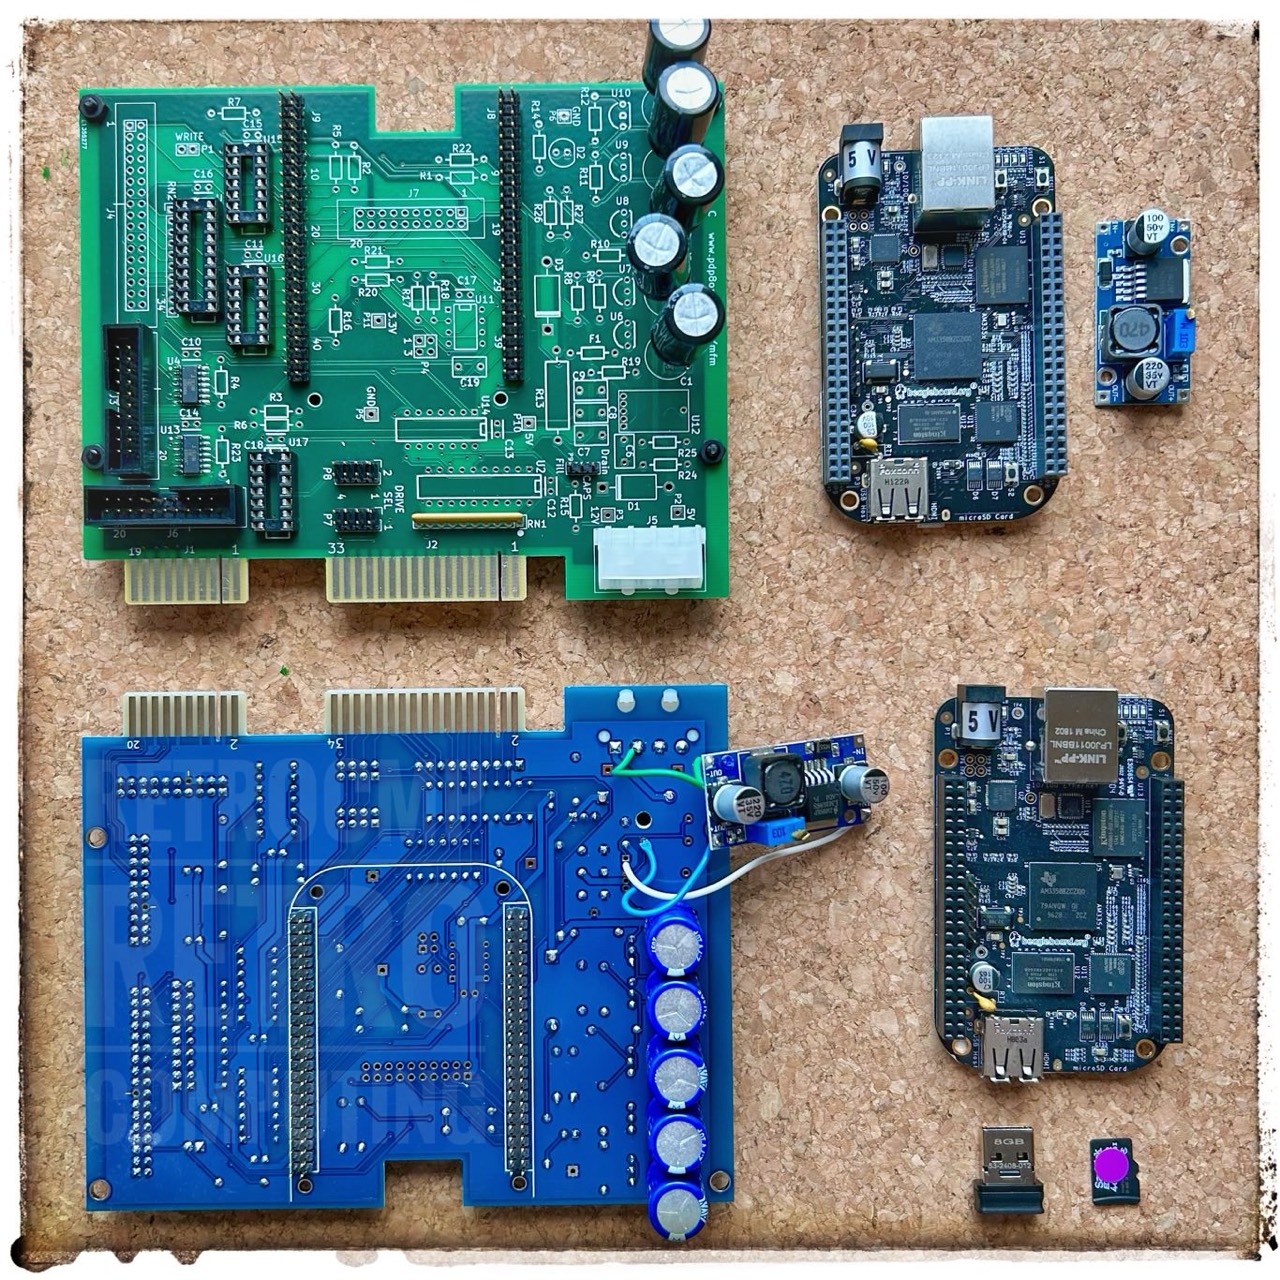
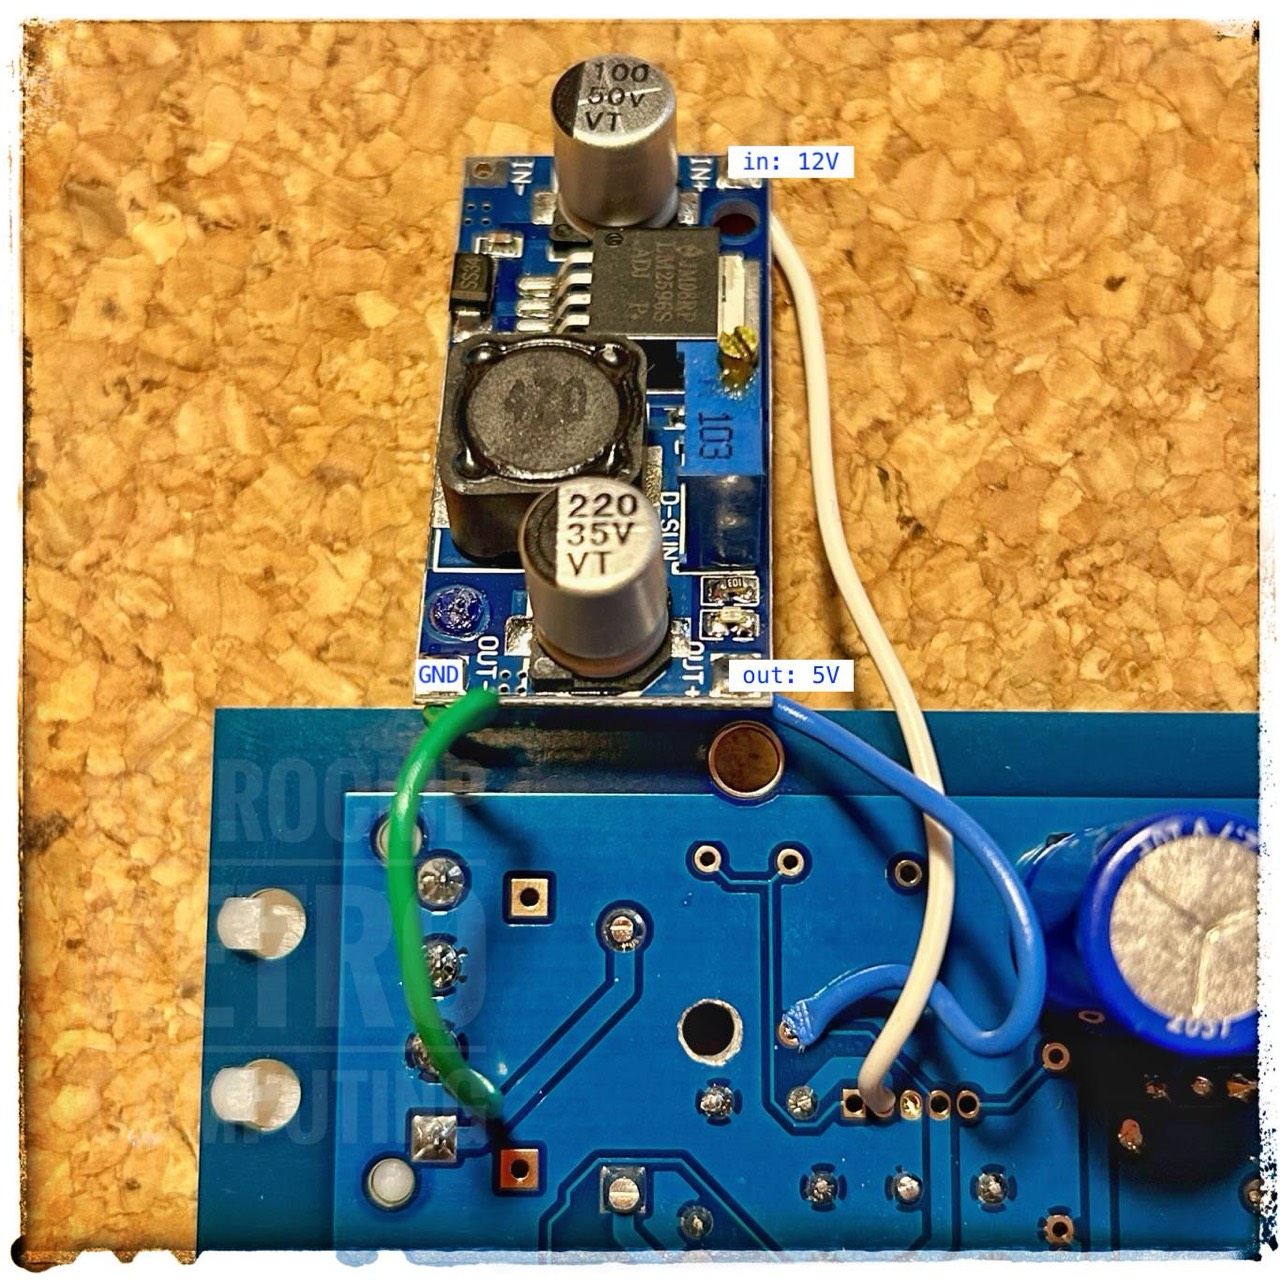
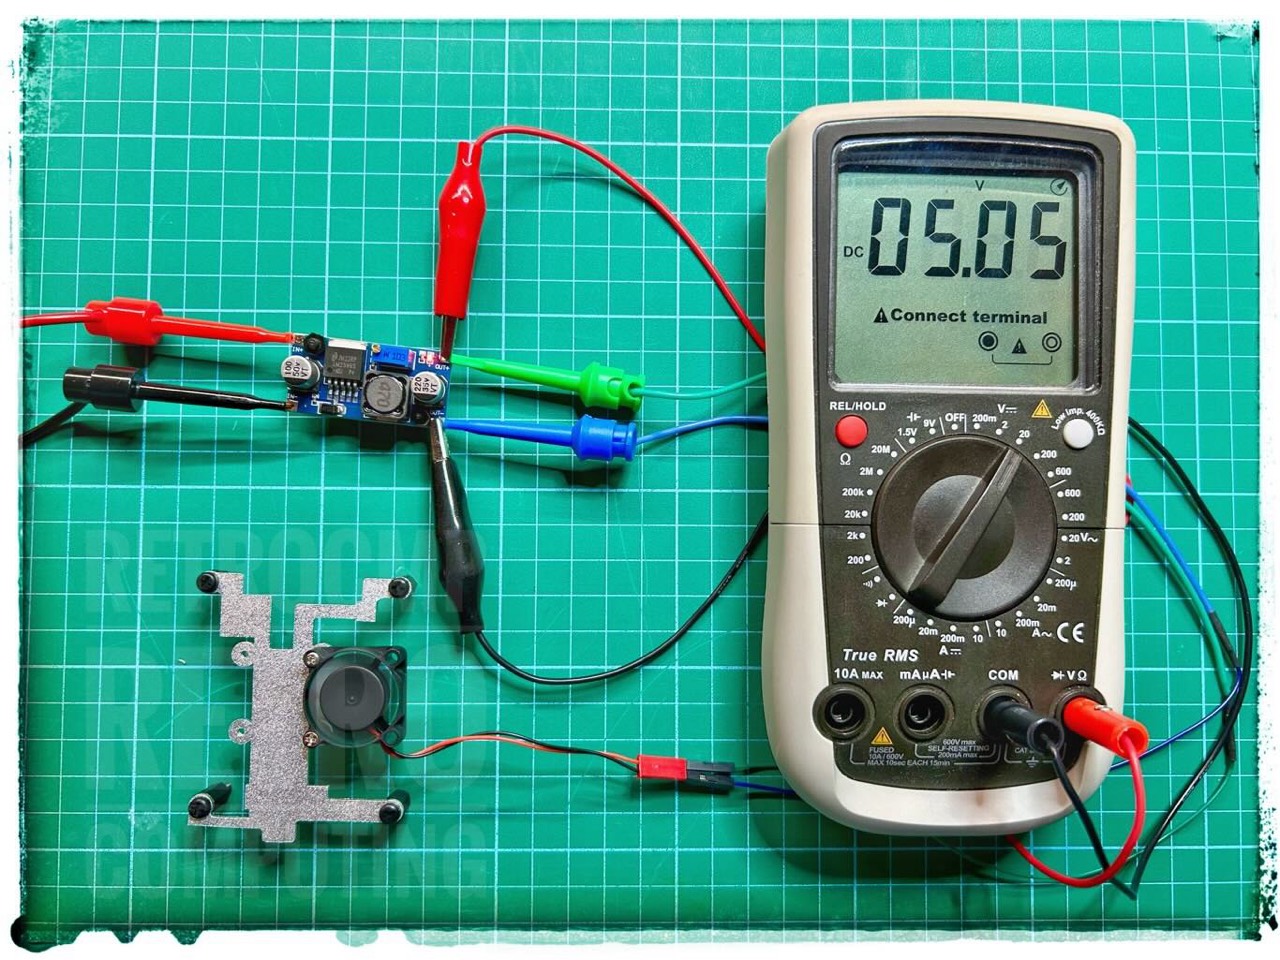
I quickly set up a small test setup as a rough preliminary setting. To roughly pre-adjust the DC converter, I quickly set up a small test setup (input 12V, output 5V).

Flashing a BeagleBone
I have two MFM-emulators, both with the BeagleBone Black (BBB), both newly flashed (Nov 2024) with BBB-mfm-emu-v4.20-OS-7.11-flasher.img (last modified Thursday, 21-Mar-2024 17:14:22 EDT). Note: The flashing did not take 5 minutes each! Read the flashing instructions carefully! Wired ethernet, serial USB and NTP are working fine.
- Rev B6 & Rev C
- Debian GNU/Linux 7 beaglebone ttyGS0
- BeagleBoard.org Debian Image 2015-07-17
- MFM version 4.20, OS 7.11
- Linux beaglebone 3.8.13-bone81 #1 SMP Fri Oct 14 16:04:10 UTC 2016 armv7l GNU/Linux
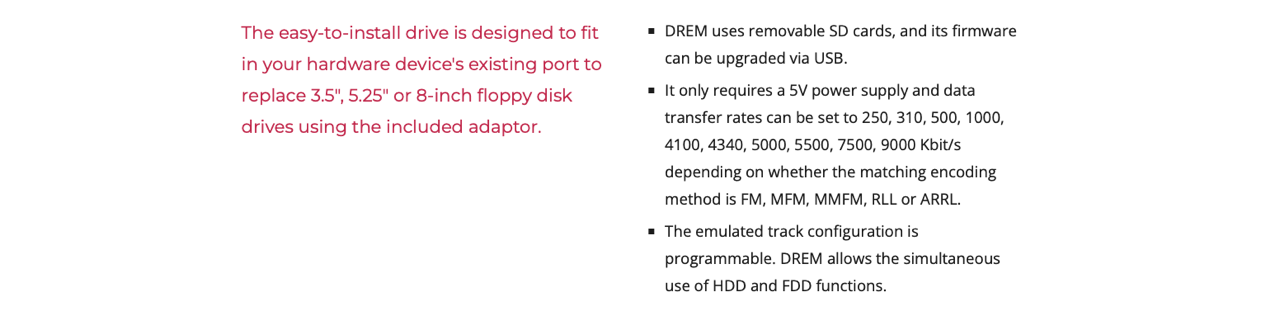
MFM Emulator DREM by PortaOne, Inc.
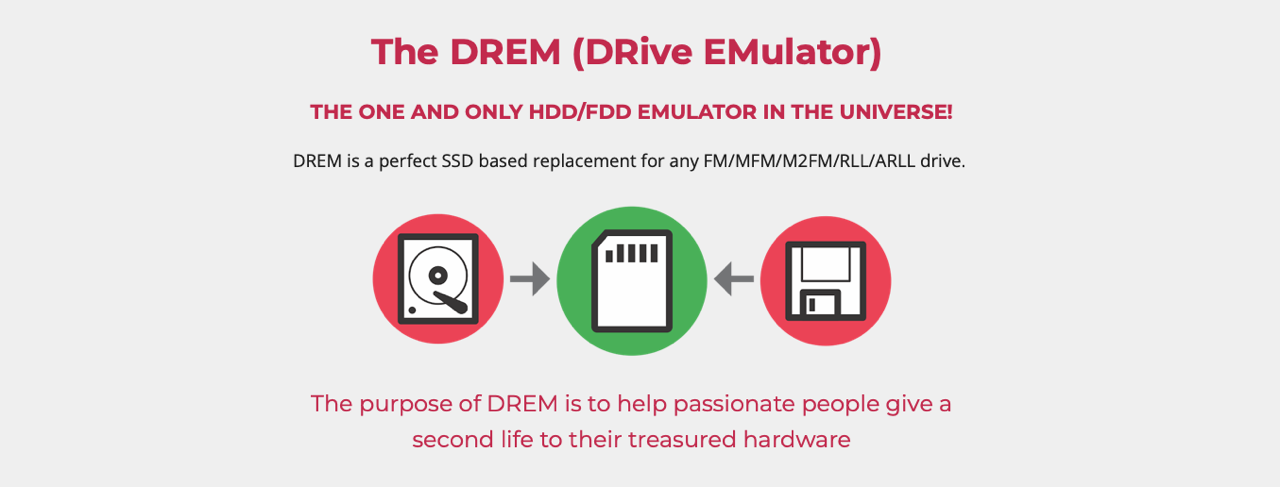
I don't know yet whether I will test my DREM for my MFM hard disks, because I have configured it as a floppy disk drive for my hard-sectored Northstar disks. Try it out. The DREM has a much wider range of functions than the MFM emulator! I assume the DREM is better.
But, the DREM can emulate but not read hard disks in!

External Links
- David Gesswein: MFM Emulator Code (Github)
- David Gesswein: MFM Hard Disk Reader/Emulator (Project page)
- David Gesswein: MFM Hard Disk Reader/Emulator (Discussion forums)
- The Decromancer: MFM Emulator
- PortaOne, Inc.: DREM Emulator
Information
Here you will find all my gathered information about the CP/M Kaypro's.
References
- (↑) pdp8online: http://www.pdp8online.com/mfm/revb/revb_board_build.shtml#checkout
- (↑) The DREM (DRive EMulator) : https://www.drem.info
My Series About the KAYPRO
--> Go to Part 1 : Versions
--> Go to Part 2 : Hardware
--> Go to Part 3 : 8K EPROM Modification
--> Go to Part 4 : Formatting a Hard Disk
--> Go to Part 5 : USER areas
--> Go to Part 6 : MASMENU - Master Menu
--> Go to Part 7 : Terminal
--> Go to Part 8 : KayPLUS ROM
--> Go to Part 9 : Advent TurboROM
--> Go to Part 10: Multicopy Plu*Perfect
--> Go to Part 11: The Kay Family & Company
--> Go to Part 12: Kaypro Design Views
--> Go to Part 13: Micro Cornucopia
--> Go to Part 14: Repairing a Kaypro II
--> Go to Part 15: Kaypro Collections
--> Go to Part 16: Kaypro General
--> Go to Part 17: Kaypro Robie
--> Go to Part 18: MFM-Emulators
--> Go to Part 19: Roadrunner ROM
--> Go to Part 20: Software
--> Go to Part 21: FAQ
--> Go to Part 22: Kaypro Virtual
--> Go to Part 23: Formatting a Floppy Disk
--> Go to Part 24: ROM, EPROM
--> Go to Part 25: Kaycomp