<-- Back to Part 1: Restoration
--> Go to Part 3: File & Image Transfer
Hard-Sectored Disks
- Disk Controller Data Format
- Floppy Disk
- Problem and Solutions
- FLUXTEEN, FLUXCOPY
- Selfmade HS10 Floppy
- Transfer From N* to PC and Back Again
- Downloads
- Information
- References
Disk Controller Data Format
- single-sided (SS)
- 10 sectors/track
- 512 bytes/sector (MFM)
- 256 bytes/sector (FM)
- side 0: tracks (0-34)
- FM (SD) with MDS-A controller
- MFM (DD) with MDS-A-D controller
- double-sided (DS)
- 10 sectors/track
- 512 bytes/sector (MFM)
- side 0: tracks (0-34) - from outside to inside
- side 1: tracks (35-69) - from inside to outide
- MFM (DD) with MDS-A-D controller
This can be seen very nicely during formatting because the header (0) first moves from the outside to the inside and then the header (1) moves back from the inside to the outside.

However, North Star Horizon not only uses single-sided floppy disks or drives as described above, but later also double-sided ones. The two-sided drives are called QUAD-DENSITY. These QD drives are not to be confused with the later QD drives (e.g. TEAC FD-55F), which have a capacity of 720 or 800 KByte!
Information by Steven Hirsch from VCF
-------------------------------------
Northstar (Advantage) DD floppy format
10-sectors per track x 35 tracks per side
MFM encoding
Single and double-sided formats are supported
-----
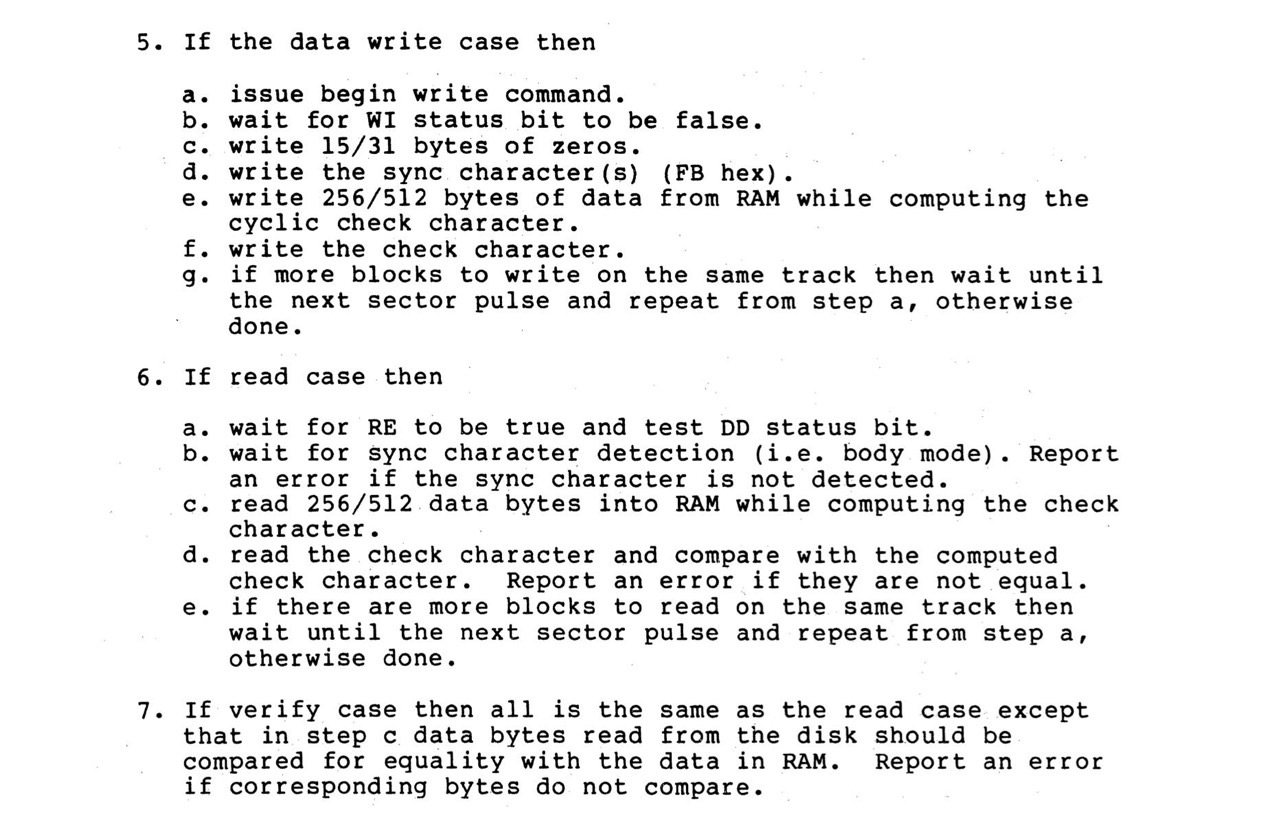
Data Layout
[Leading (falling) edge of sector index]
[96 us delay]
[Preamble = 33 Bytes of 0]
[Sync 0xFB 1-byte]
[Track-Sector 1-byte (see below)]
[Data 512-bytes]
[Checksum 1-byte (see below)]
There is no formal padding at the end of the sector. In a hard-sector
format the diskette controller is expected to re-sync on the next
index hole.
-----
Track-Sector Byte Detail
Bits 0-3 = Sector (0..9)
Physical Order from rotational index: 0 2 4 6 8 1 3 5 7 9
Bits 4-7 are related to the track.
On side 0 of a diskette, the value in bits 4-7 cycles through the
sequence: 0x0 0x4 0x8 0xC as track advances. In other words,
tracks 0, 4, 8, 12, 16, 20, 24, 28, 32 have a value of '0x0' in the
upper four bits. Tracks 1, 5, 9, 13, 17, 21, 25, 29, 33 have a value
of 0x4 in the upper bits, etc.
On side 1 of a double-sided diskette, the value in bits 4-7 cycles
through the sequence: 0x1, 0x5, 0x9, 0xD as we advance inward from the
outermost track. This amounts to the same pattern shown above, but
with bit 4 set to denote the second side of the diskette.
-----
Checksum Byte Detail
The checksum algorithm works as follows:
// Sector data
unsigned char data[512];
unsigned char csum = 0;
for (int i=0; i<512; i++) {
csum = csum ^ data;
csum = (csum << 1)|(csum >> 7);
}
// Resulting value is written to diskette as the checksum byte.
-----
Logical data organization on double-sided diskette
Data is written in a serpentine order:
Side 0: Track 0..34
Side 1: Track 34..0
-----
NOTE:
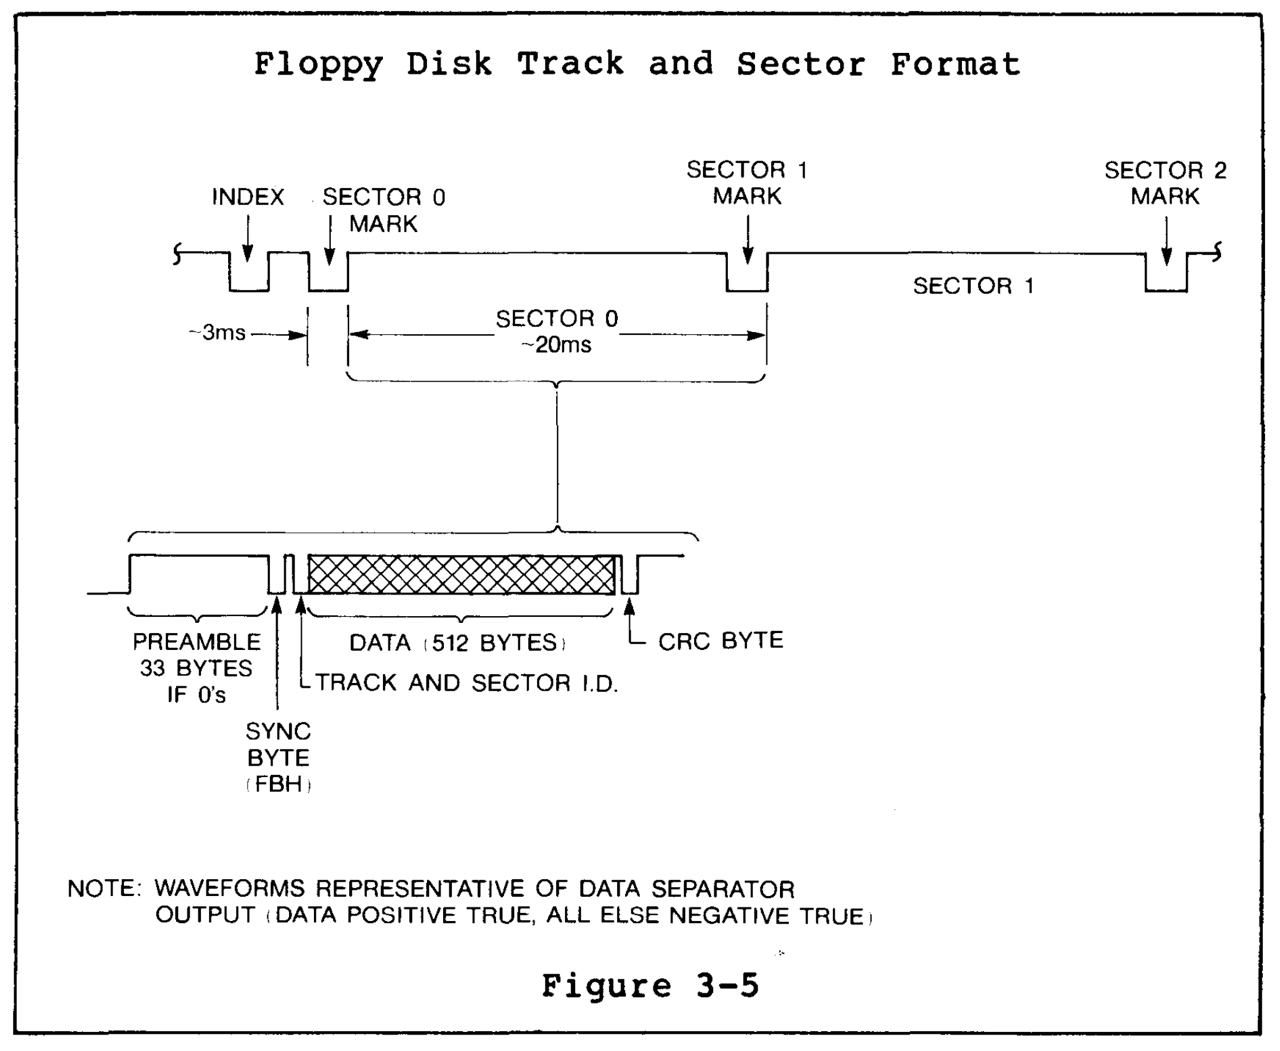
The Northstar technical documentation has a discrepancy between
figures and text. Figures 3-4 and 3-5 show the layout for DD MFM
diskettes with 512-byte sectors. The text references an older SD FM
format with 256-byte sectors.
The document you are reading now is intended to cover the DD MFM
512-byte format.
Booting
Double-density disks [MFM] boot from track 0, sector 4. This is a normal 512-byte double-density sector.
Single-density disks [FM] boot from track 1, sector 8. This is a special 512-byte single-density sector. (Normal single-density sectors are 256 bytes long.)
In either case, the first byte in the sector is the RAM page address (high address byte) for the boot sector. The subsequent 511 bytes are loaded into RAM starting at byte 1 of the specified page (xx01). The next byte after these 512 bytes is the CRC of the first 512 bytes. [6]
Floppy Disk
According to the above format you need a hard-sectored 5.25" floppy disk with 10 sectors (HS10). I was lucky to be able to buy about 20 pieces (NOS) on ebay last year (and 20 pcs. HS16). With my DSDD disks I can of course also work one-sided floppies and in FM or MFM format.

Problem and Solutions
The only possibility known to me at present (02/2023) to write hard-sectored floppy disks under Windows is FLUXTEEN/FLUXCOPY; see below. The Kryoflux adapter can only read HS floppies, but not write them.
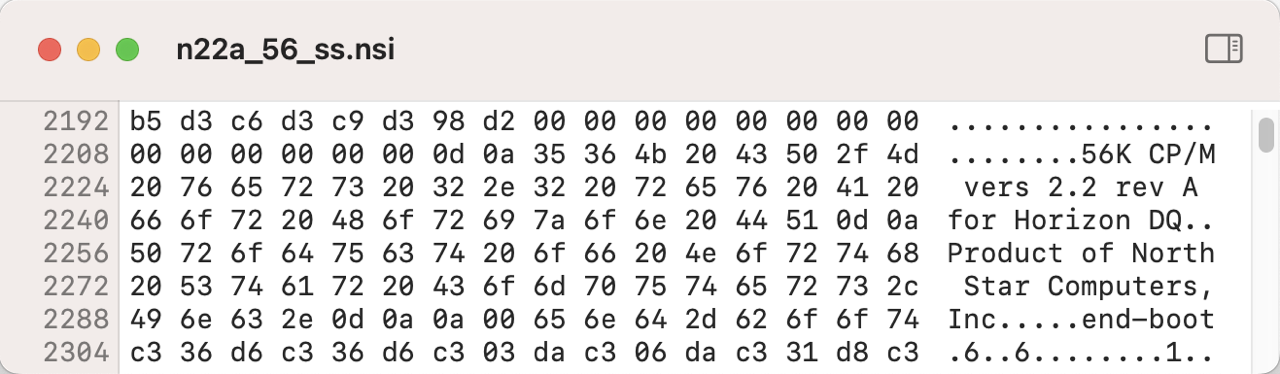
There are dozens of NSI images of the North Star Horizon on the Internet, by David Dunfield, Howard Harte, and Mike Douglas, among others. But I currently have not found a way to write North Star Horizon NSI images back to a HS10 disk (outside the N*), FLUXCOPY can only write it's own special raw FLX format; not NSI.
According to David Given (cowlark.com) and others the *.NSI image is an equivalent to an *.IMG image. It is a simple a raw dump of a floppy disk content: byte by byte, sector by sector, track by track and side by side; only pure data no other information.
Cyl × Hds × (Sec per trk) × (byte per sec)
(FM) 35 x 1 x 10 x 256 = 89,600 bytes - single
(MFM) 35 x 1 x 10 x 512 = 179,200 bytes - double
(MFM) 35 x 2 x 10 x 512 = 358,400 bytes - quad
The corresponding program for reading in only needs to know which format it is. Under DOS/Windows well known floppy imaging programs are RawWrite and WinImage.
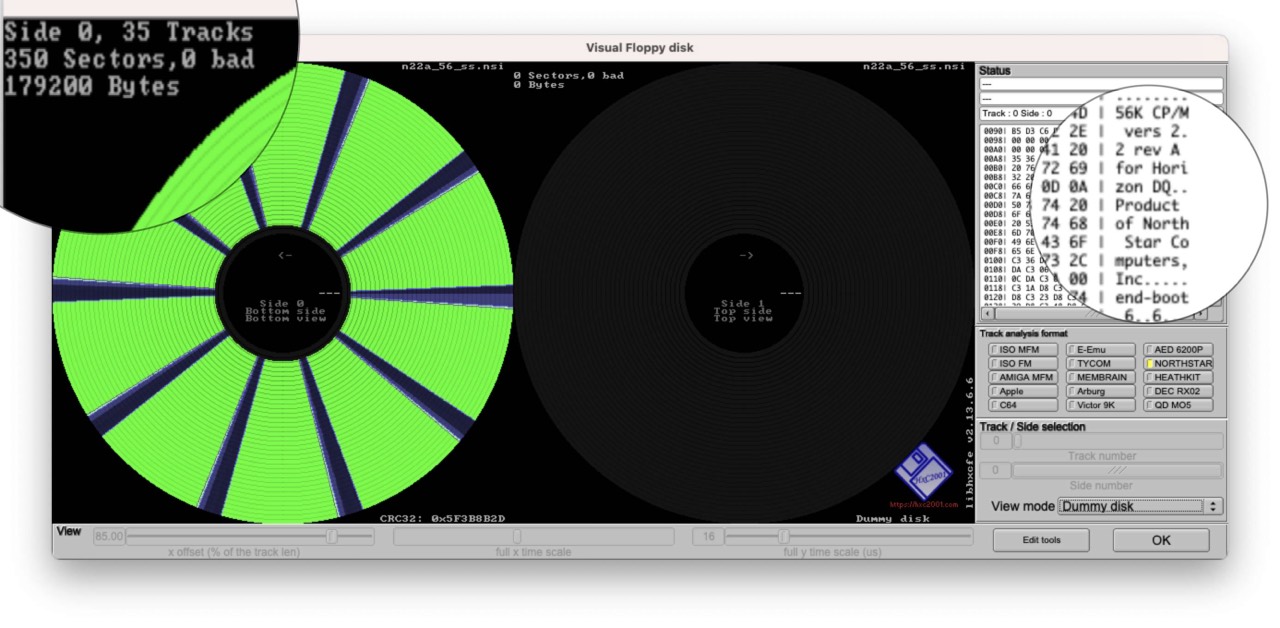
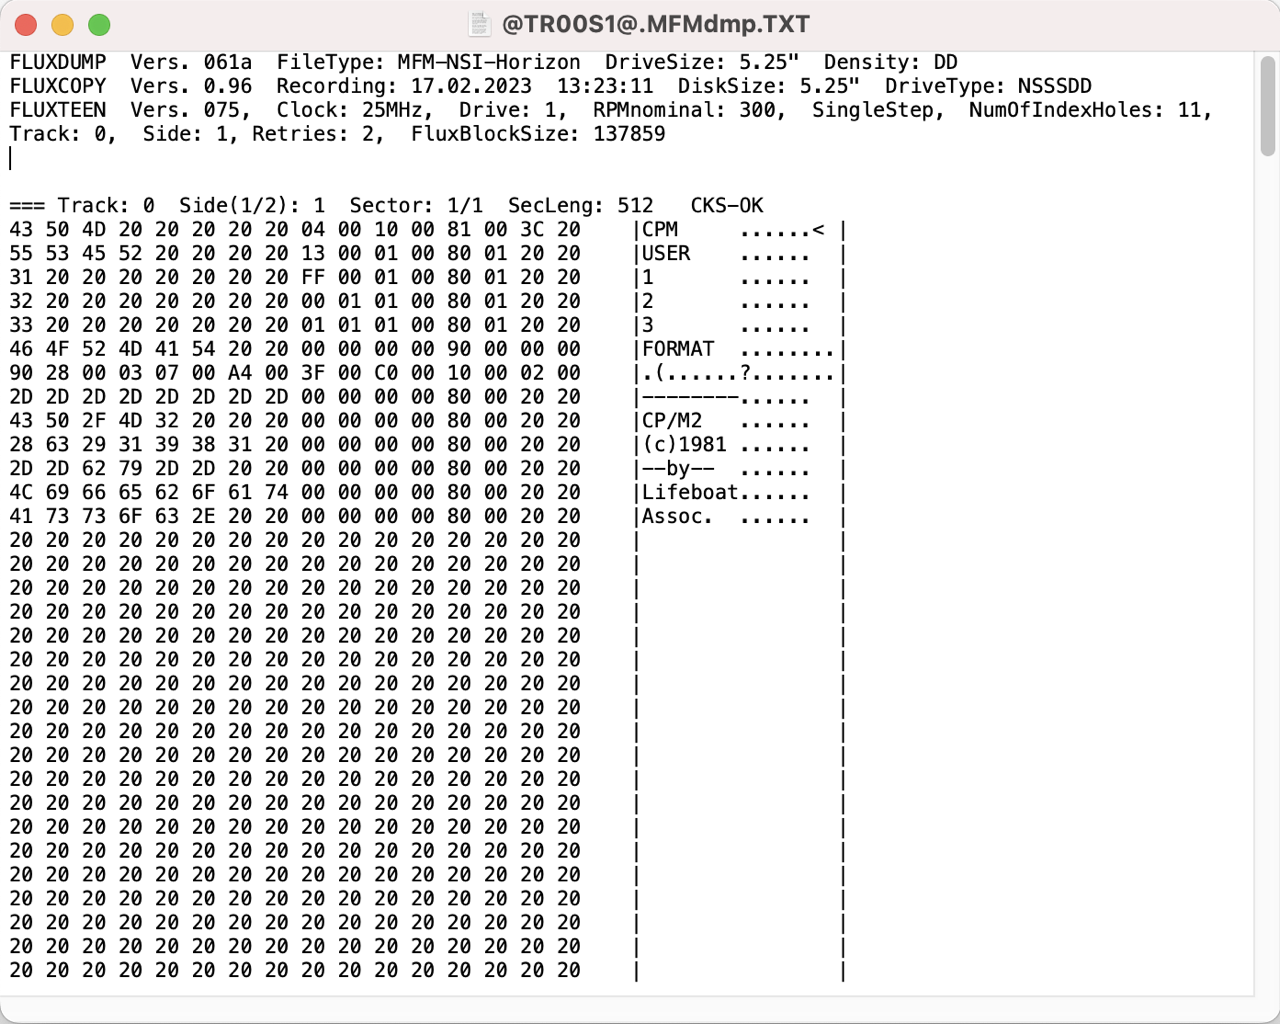
Therefore you can easily view a NSI image with a HEX editor, see next.
FluxEngine
If you have read a little further on the above mentioned page of David Given, you have already found the solution: FluxEngine can directly write *.NSI images to HS10 disks.
But you can not build an adapter at the moment, because the required development board CY8CKIT-059 PSoC 5LP is currently (04/2023) not available on the market. Delivery times are given with up to 50-80 weeks.
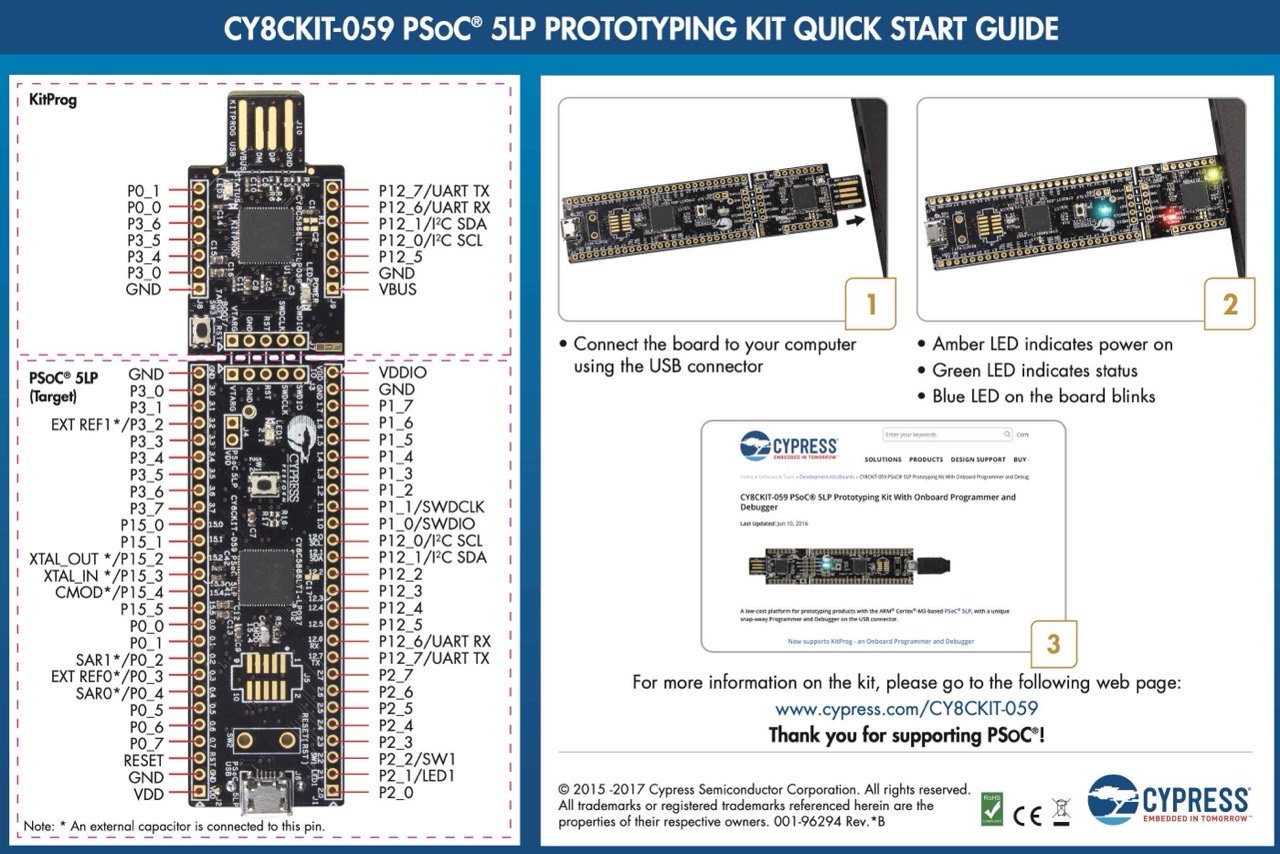
RESULT: DEAD END
HxC Floppy Emulator
The program HxC Floppy Emulator (hxc2001.com) is also very promising. It can read in and export a variety of formats. So far I have had good experiences with it. The visualization tool is also excellent here.
I have tested a lot with this program, but when converting NSI -> HFEv3 -> RAW it seems that not everything runs smoothly. The RAW files can not be converted with FLUXKRYOCONV to the necessary FLX format for the FLUXTEEN. According to the author of FLUXKRYOCONV (PAW), the time intervals (in ms) between the index hole and the sector hole before and after it are not synchronized correctly.
RESULT: DEAD END
Flashfloppy (Keirf) & Gotek
There have also been efforts to emulate hard-sectored floppy disks with these two systems for quite some time. Here are a few links to get you started:
- Micropolis support and hard sectors #393 - Keirf, Nov 29, 2020
- HFEv3 hard sector support #400 - Keirf, Dec 11, 2020
- Add hard sector support to infrastructure and HFE #412 - Keirf, Jan 02, 2021
- FlashFloppy Hard Sector Testing - VCF, Apr 4, 2023
I cannot say at this time (04/2023) whether this path will lead to success. Please read and try yourself.
RESULT: PROMISING
DREM
But then there is the DREM! Simply ingenious. Granted this hardware isn't cheap, but it's awesome. With DREM you can emulate both, floppy drives and hard disks for old computers and that too at the same time.
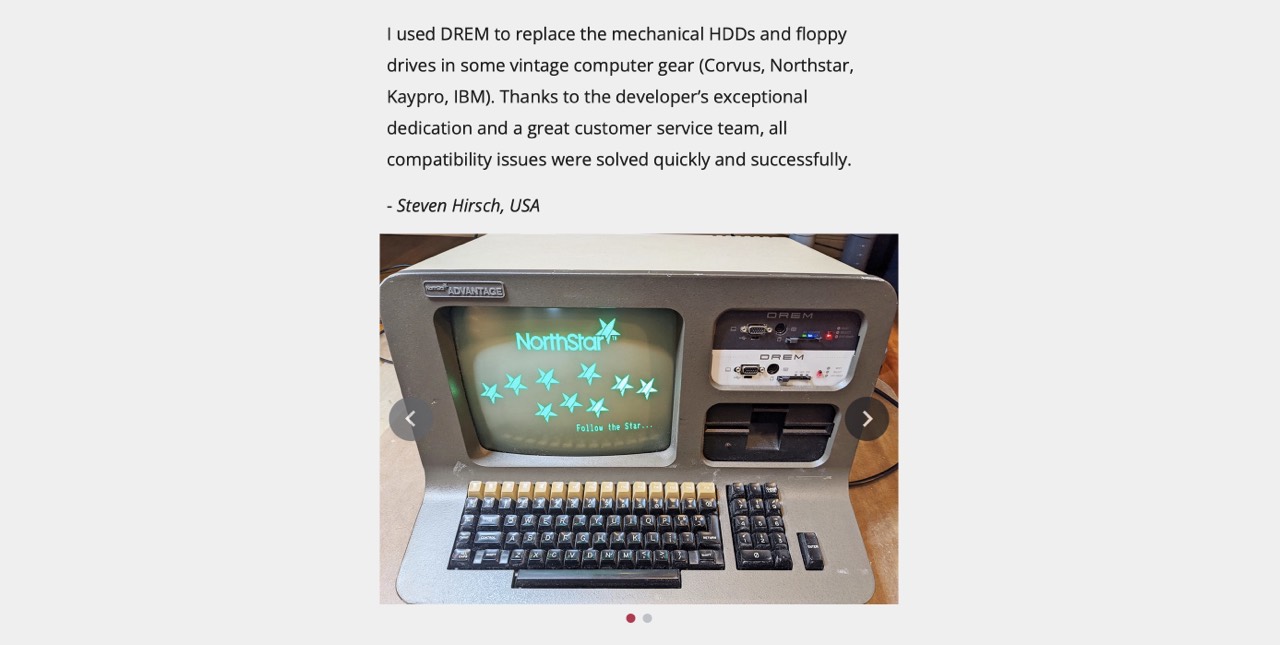
I am in casual e-mail contact with Steven Hirsch regarding Kaypro computers.
Why is the DREM now the solution to my NSI problems, i.e. writing to real HS10 disks. Quite simply. The DREM supports the reading/mounting of NSI image files. Just change the file extension from NSI to DSK, adapt the corresponding CFG file (see following) for the DREM, start it, mount it and you are done.
[DSK]
Name=Northstar
Encoding=MFM
RPM=300
Tracks=35
Sides=1
Sectors=10
Sector Size=512
First Sector ID=0
Format=NORTHSTAR-FDD
Hard Sectors=10
L1 Size=35
Interface=SHUGART

In the meantime (Feb. 2023), I have tested single-sided and double-sided formats flawlessly. The basic setup is as follows:
- Mount NSI image in DREM "floppy".
- Read out DREM "floppy" with FLUXCOPY.
- Write HS10 floppy disk with FLUXCOPY.
- Boot HS10 floppy from 3) in N* Horizon.
RESULT: IT WORKS

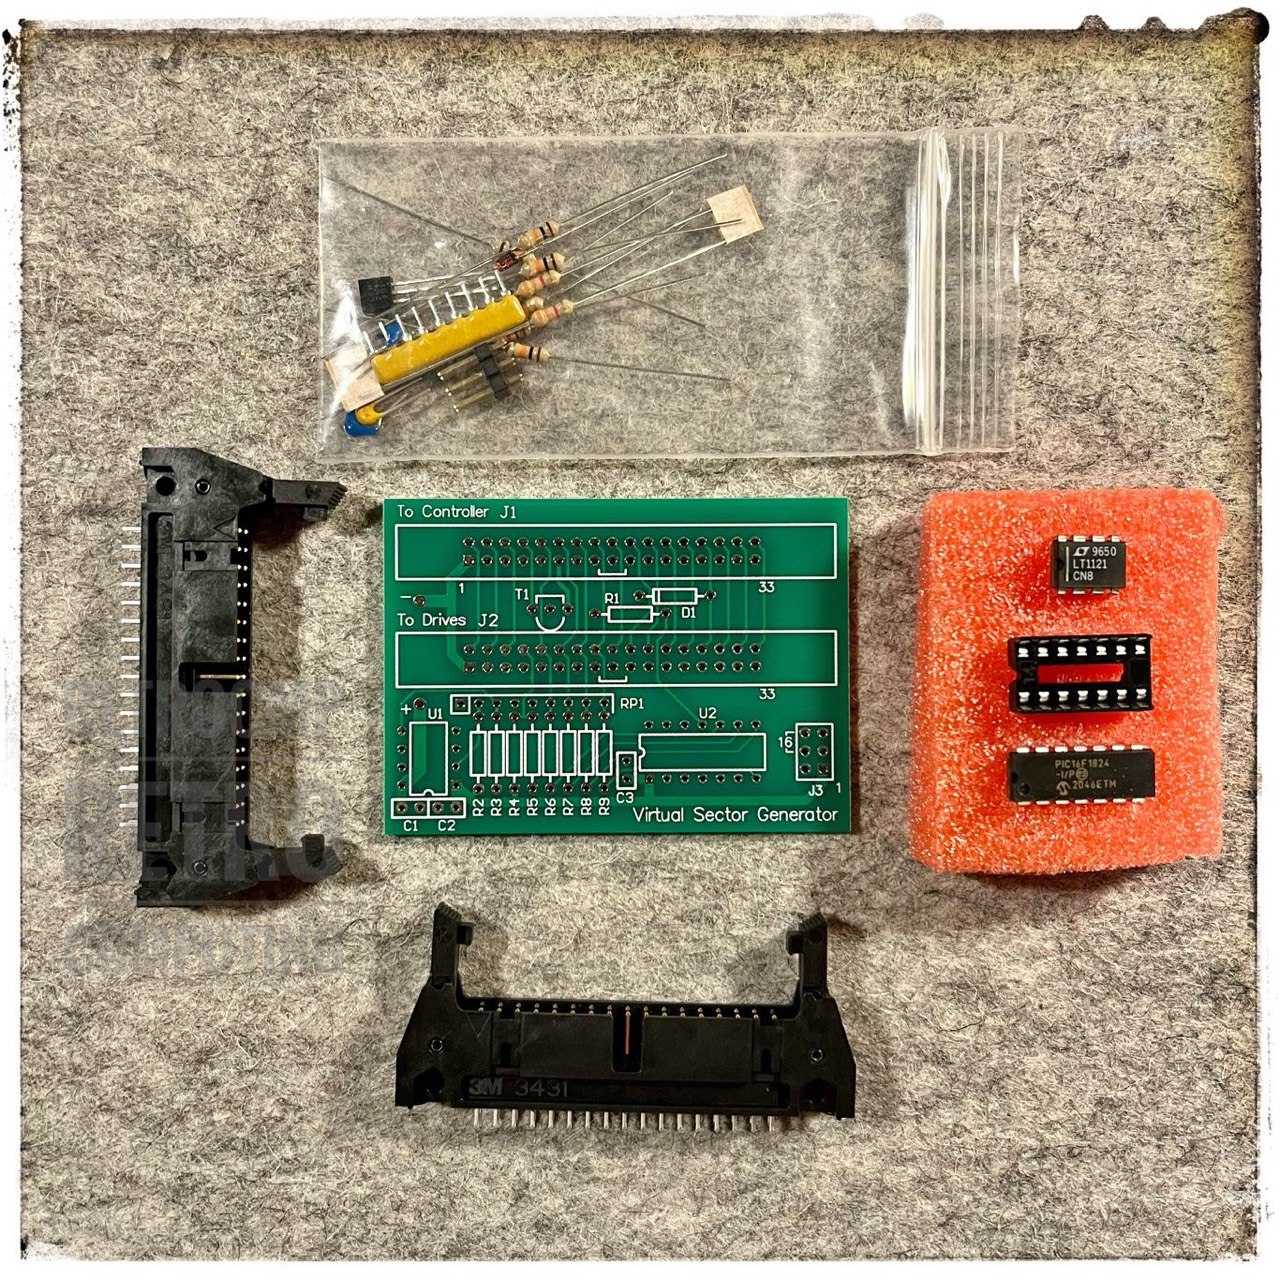
Virtual Sektor Generator
Arrived today (02/24/2023)!
FLUXTEEN, FLUXCOPY
At this point I would like to mention the FLUXTEEN/FLUXCOPY project by PAW from Vienna. With the help of his adapter I have for example read out a real HS10 floppy disk (under Windows 10), then written the contents to another empty HS10 floppy disk and booted my North Star Horizon with it. It works flawlessly! Chapeau!
It is now also possible to use FLUXDUMP to extract the contents of the FLUXCOPY FLX files.
Selfmade HS10 Floppy
Since you can't get new hard-sectored disks anymore, you either have to use Mike Douglas' VSG or make your own floppies. And that is easy peasy, believe me!
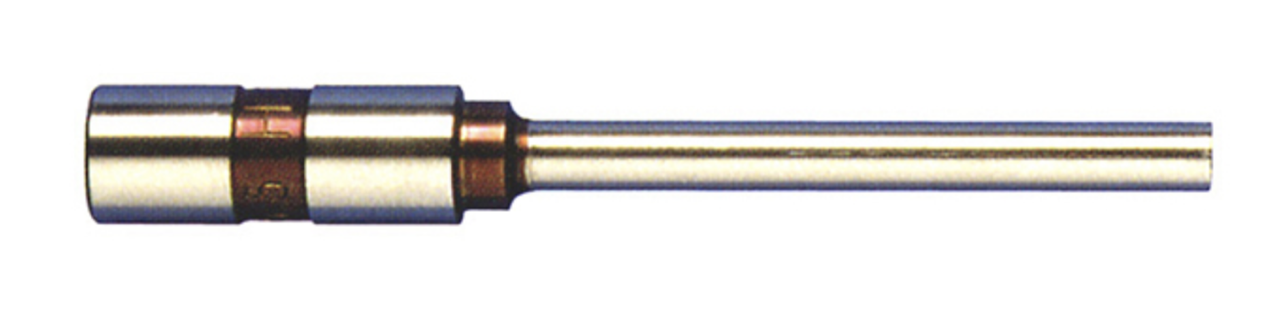
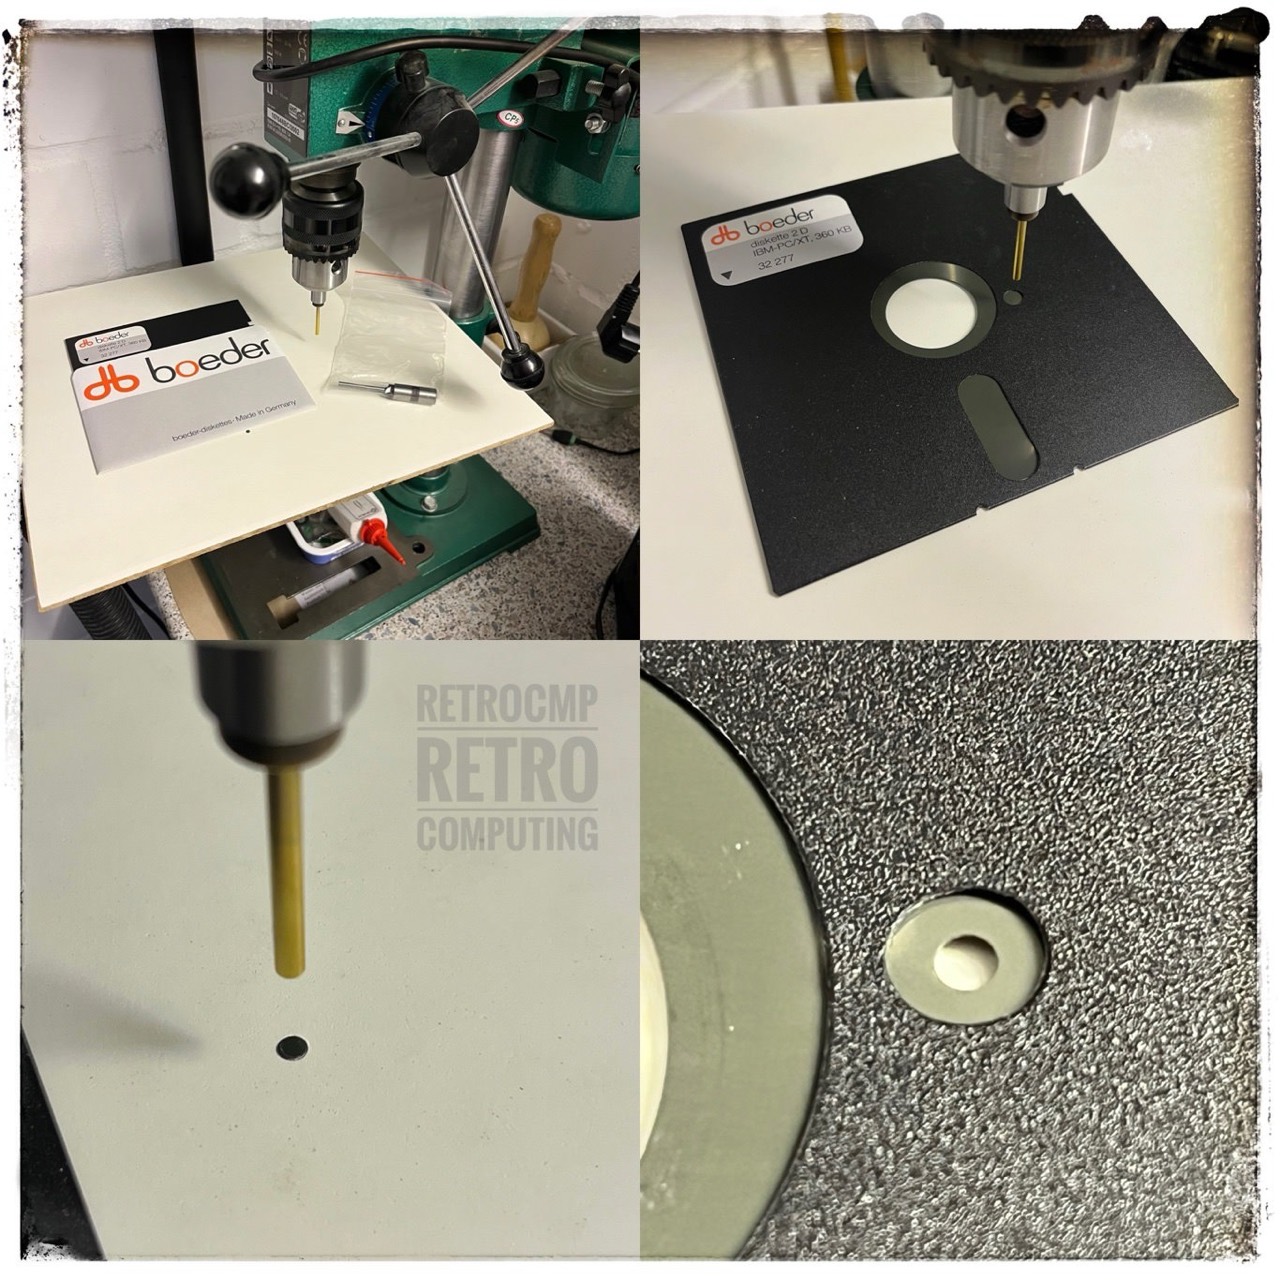
You will need: an old drive frame (here: TEAC FD-55A), a simple 10 sector pattern, a medium-weight hammer and a professional paper drill bit and minimal craftsmanship. You only have to turn the spring sheet or plate and the floppy is always perfectly fixed.
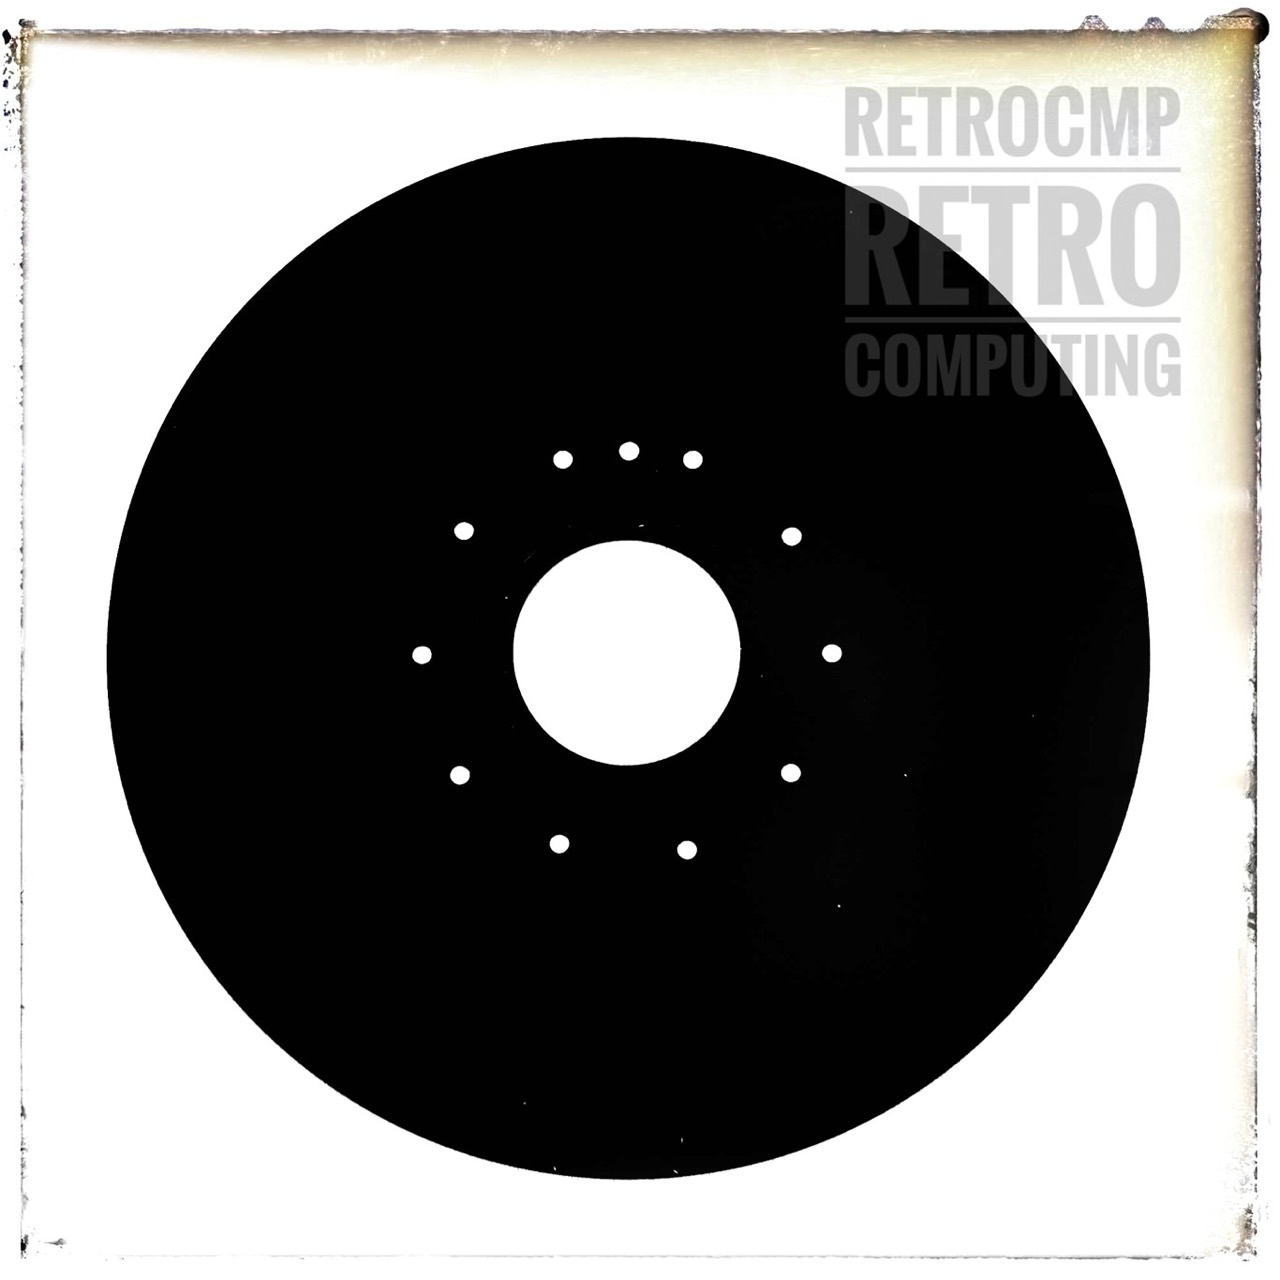
Adjustment: Insert disk and rotate until the floppy index hole appears exactly centered. Remove diskette and align floppy template exactly (index mark to mini pin) and fix it with small a wedge. Then insert the floppy disk again. Index hole and marking are now aligned and off you go: rotate, fix, remove, punch, insert ... (10 times) ... 5 Minutes and you are done.

One gap is not 100% correct but the holes are perfect. Absolutely no burrs, nothing scrapes. This was supposed to be just a first test, but even that worked. I have booted my North Star Horizon with this floppy.
With a little practice, that will be perfect. And it costs almost nothing; only the punch. And it is fun!
Update: 03/09/2023:
Now I use a drill press but without drill. Just lower and lightly punch until you hear the punching. Yes, you can hear it; don't press too much, with fingertip sensitivity. The holes will be absolutely perfect! Five minutes and you are done with one floppy!
Transfer From N* to PC and Back Again
First you have to solve the problem with the hard-sectored disks. Start with the DREM (expensive but it works) and then try to integrate a real floppy drive.
--> Go to Part 3 : File and Image Transfer
Downloads
Here you will find all my gathered downloads for the North Star Horizon.
Information
Here you will find all my gathered downloads for the North Star Horizon.
References
- (↑) ebay sales picture
- (↑) Google Maps
- (↑) NORTH STAR, MICRO-DISK SYSTEM MDS-A-D DOUBLE DENSITY, Manual, 1978, page 33
- (↑) https://www.drem.info/drem/testimonials
- (↑) NORTH STAR ADVANTAGE TECHNICAL MANUAL, 1980
- (↑) Martin Eberhard, https://deramp.com/downloads/north_star/hardware/Double%20Density%20Controller/PROMs/NSBOOT.ASM
My Series About the North Star Horizon
--> Go to Part 0: Information
--> Go to Part 1 : Restoration & (my) S-100 Boards
--> Go to Part 2 : Hard-Sectored Disks
--> Go to Part 3 : File and Image Transfer
--> Go to Part 4 : PROM Modification
--> Go to Part 5 : History
--> Go to Part 6 : RAM
--> Go to Part 7 : S-100 Bus
--> Go to Part 8 : Capacitors
--> Go to Part 9 : Virtual Horizon
--> Go to Part 10 : S-100 Boards