<-- Back to Part 5: PSU
--> Go to Part 6: The High Nibble
The High Nibble
Last revision of this page: January 26, 2025

- Assembling
- Day 01: 02/16/2024
-
- PCB overview & ESP32 preparation
- Soldering the PSRAM SMD and the microSD Card Socket
- First boot
- Day 02: 02/17/2024
-
- The frontpanel is finished
- Day 03: 02/23/2024
- Issues
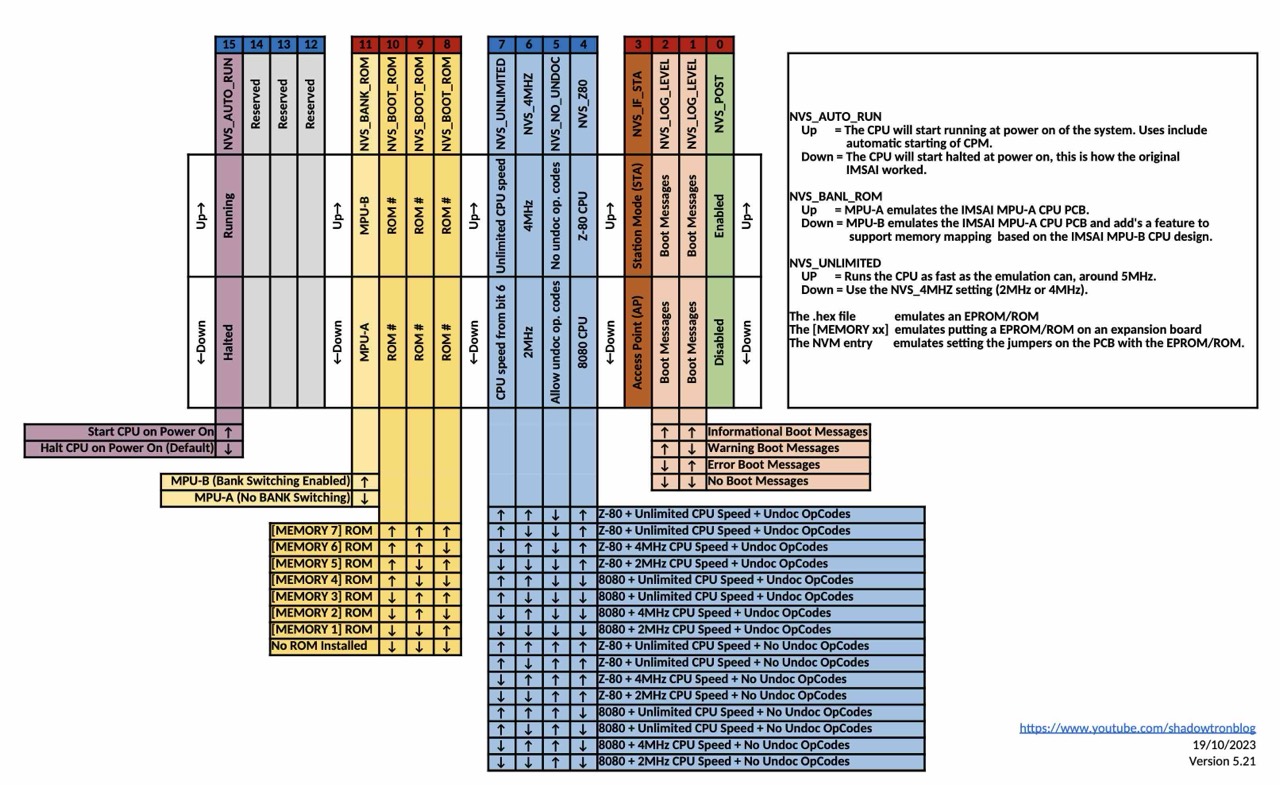
- NVS Switch Settings
- Links
- References
Assembling
Day 1

Soldering the PSRAM SMD and soldering the microSD Card Socket.

Soldering the microSD Card Socket
Soldering support components and make a first boot to test ESP hardware and the SD card.
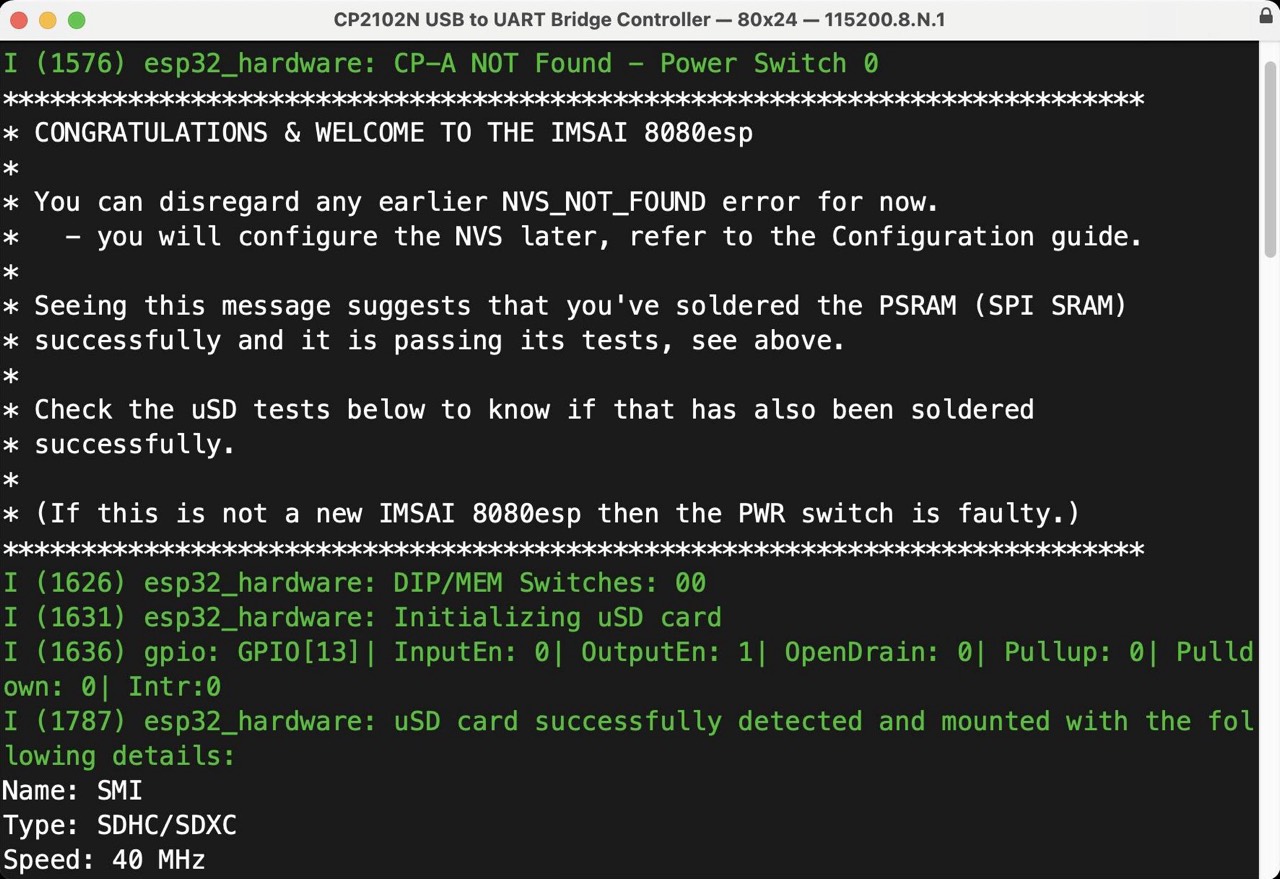
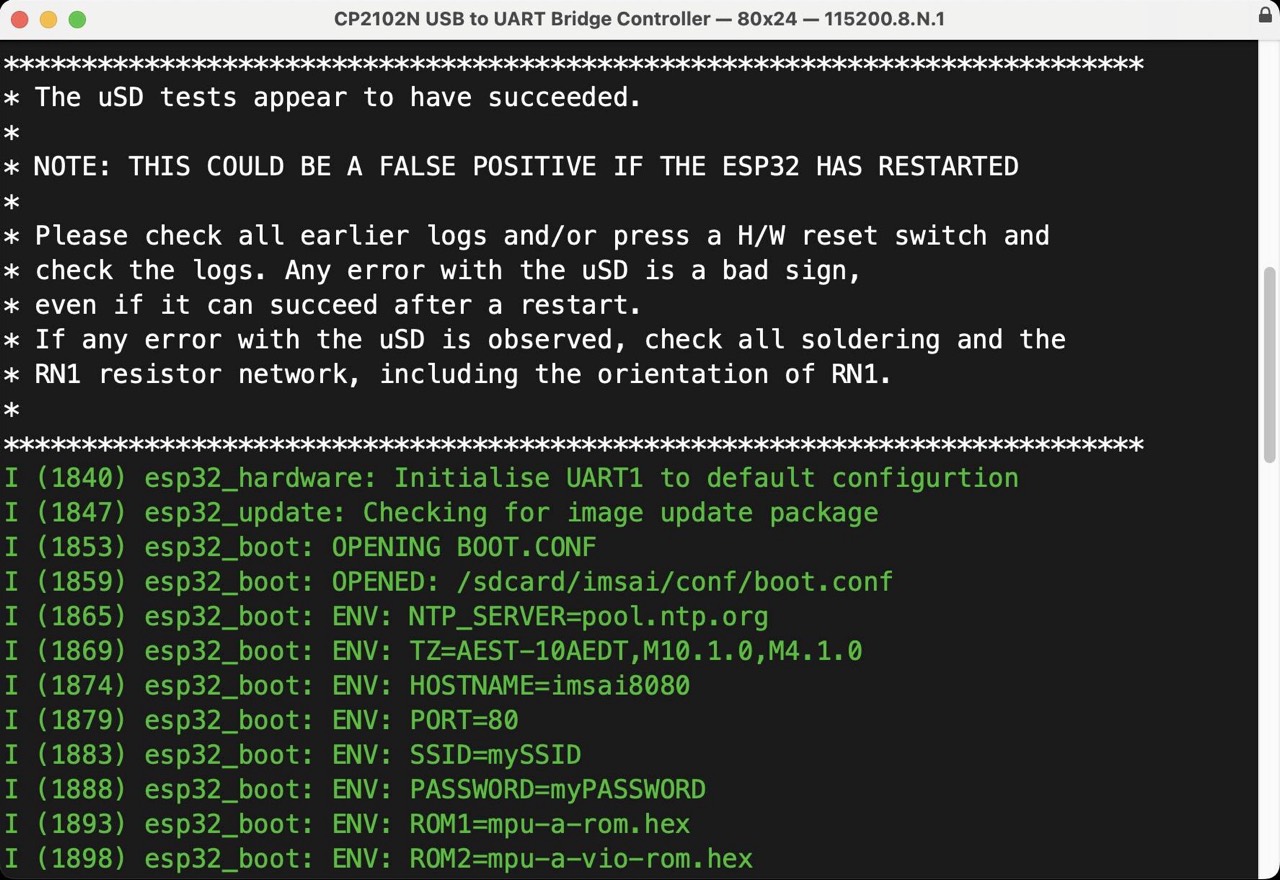
Update 02/24/2024: In retrospect, however, it turned out that the µSD card was not soldered correctly after all. But more on that later.
Day 2

One hurdle or weak point to overcome is the SD card holder, see picture above. Not really a problem at first glance, but the devil (can) be in the detail. This was also the case for me. First of all, it is important to correctly align and fix the four fixed points (blue). Then solder the 9 connections with plenty of flux. And this is where the problem may lie. Although the solder joints looked perfect at first go, I had to re-solder 4 times with flux because the SD card was regularly not recognized. At the beginning I didn't know where the fault could be because everything looked perfect. But it wasn't! I was already despairing. Now it works. This problem is often described on the Internet. Have a look at the discussions forum at Github.

Day 3

Issues
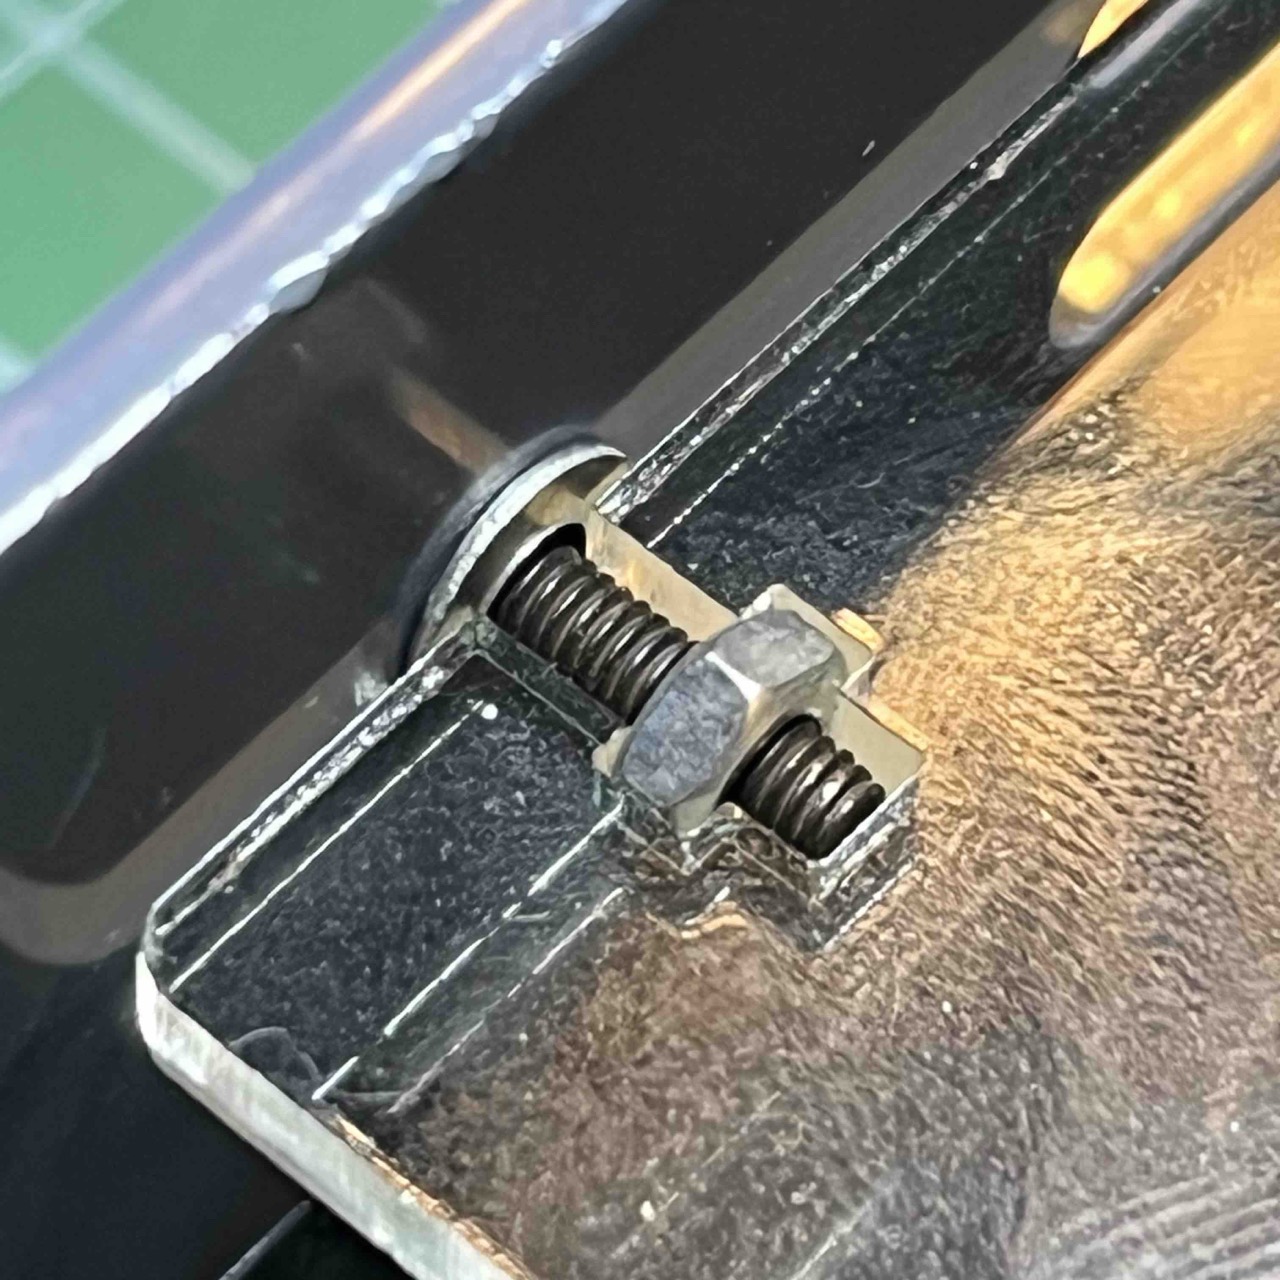
My IMSAI8080esp front panel is finished, now it just needs to be "fixed" correctly. I tested Dave's instructions with the corner reinforcements and was not satisfied with them because the first micro-cracks still appeared. So, what to do.
The problem is that the screws/nuts are supposed to create a compressive stress in the Plexiglas through the tension. However, as the Plexiglas is not 100% in contact with the aluminum housing, tensile stress is generated in the small recess. This definitely leads to a crack in the corner, see picture.
There must therefore be no tensile stress in the small recess. I avoid this simply by placing a small, thin washer between the housing and the Plexiglas. Now there is a direct transfer of force from nut to Plexiglas to washer to housing to screw head. The tensile stress in the screw/nut now only generates a compressive stress between them. That's it.
But here too, please tighten the screw with care; especially as far as the two lower opposing ones are concerned. [3]

NVS Switch Settings
External Links
- Website: The High Nibble
- Github: The High Nibble (firmware)
- Youtube: The High Nibble (Assembly)
- Youtube: The High Nibble (IMSAI 8080esp Replica)
- Youtube: ShadowTron Blog
References
- (↑) The High Nibble, https://thehighnibble.com/imsai8080/#imsai-8080-replica
- (↑) Shadow Tron Blog, https://www.youtube.com/shadowtronblog
- (↑) haglebu, https://github.com/orgs/thehighnibble/discussions/141
My Series About the IMSAI 8080
--> Go to Part 0: Information
--> Go to Part 1 : Restoration (1) - Restoration (2) - Restoration (3)
--> Go to Part 2 : History
--> Go to Part 3 : Front Panel
--> Go to Part 4 : Emulator
--> Go to Part 5 : PSU
--> Go to Part 6 : The High Nibble
--> Go to Part 6 : RAM (of my North Star series)
--> Go to Part 7 : S-100 (of my North Star series)
--> Go to Part 8 : Capacitors (of my North Star series)